FREE counter and Web statistics from sitetracker.com

Tuesday, March 31, 2009

heretical red beans and rice


Long time, no blog. Drew has been picking up my slack admirably, but I'm still a bit shame-faced. To compensate, I am going to reveal the secret to my much-beloved red beans and rice.


Are you ready?


The secret is canned beans. Gasp! The horror! I recently told this secret to a friend from Lafayette, Louisiana (who has not sampled my fabulous beans), and she delicately wrinkled her nose and eloquently said, "Yuck."

I know it's unorthodox (and heresy according to some) to use canned beans, but folks, they are delicious, easy, and cheap. I got my recipe from Que Sera Sera, a restaurant here in Jacktown where I once waited tables many moons ago. (Why a Cajun restaurant has a Spanish name, I'll never know. Maybe the owner, Boo Noble, has a thing for Doris Day.) And Que Sera used canned beans. I've taken some liberties with the recipe, but it hasn't protested.


Red Beans and Rice
(serves 3 or so)

1 can of Blue Runner creole style red beans*
1 link andouille sausage (or other spicy smoked sausage), diced
2 stalks of celery, chopped
1 onion, chopped
1 green bell pepper, chopped
1 jalapeno, chopped (optional)
1 clove of garlic, chopped
1 bay leaf
2 tablespoons butter
1/4 cup water
Louisiana hot sauce


*(This is SO IMPORTANT. You cannot use plain old kidney beans, or else it will be gross. You can only use Blue Runner. If you can't get Blue Runner, I'm sorry, you cannot make this recipe.)

In a deep saucepan, saute the sausage on medium-high heat until browned. Add all of the vegetables. Salt the vegetables. Add a little oil to the pan if you need it to keep the veggies from sticking. Saute the vegetables until softened but not browned. If you like your beans very spicy, you can add cayenne pepper at this step. Add the beans out of the can. Add the water (you can add more or less depending on your desired consistency). Add the bay leaf, the butter, and hot sauce to taste. Stir. Now cover it, turn the heat to low, and let all the flavors combine and mingle while you make your rice. Once the rice is done, the beans are, too. Serve over the rice.

At Que Sera, you have the option of topping your beans with cheese. This is more heresy, but man, few things on this earth are not improved by the addition of a healthy grating of pepper jack or cheddar cheese. So we serve ours topped with cheese, too.

I hope you can lay your prejudices against canned beans aside and make these beans. I have a lot of affection for this recipe because it was one of the first things I ever cooked for Drew, when we first started dating and neither of us (1) had any money and (2) knew how to cook at all. It still turned out great. Who knows? Maybe the beans convinced Drew to take a chance on me. I hope if you make them that you turn out as lucky.

Sunday, March 22, 2009

poking the doughboy

Flush with pride because my Smoky Eggs Benedict recipe is a finalist in the Mississippi Magizine contest, I have decided to enter the Pillsbury Bake-Off. I'm not expecting to win, but the prize is a million bucks. What do I have to lose?

There are two lists of products that must be used. One item on the lists is brownie mix, and because I have been thinking of stuffed brownies for a while, I decided to see what I could do.

Everyone loves tiny brownies, so I used a mini-muffin pan to make bite-sized treats, and I filled them with peanut butter. My first batch were difficult to remove and kind of fell apart, but I've figured out the trick. Line the muffin pan with foil. It's easiest if you use small pieces that overlap. Then, grease the foil. When the brownies are cool, you can just peel the foil off of them.
Here you go. (I admit, it's a little Sandra Lee-ish, but they do taste good.)
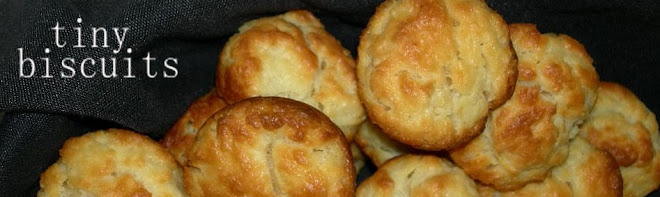
Loaded Brownie Bites

1 box Pillsbury milk chocolate brownie mix
3 eggs
1/2 cup vegetable oil
1/2 cup peanut butter
1 can sweetened condensed milk
Preheat the oven to 350.

In a medium bowl, mix together the peanut butter and sweetened condensed milk. Beat until smooth.

Combine the brownie mix, eggs, and oil in another bowl. Stir until well-mixed.

Line a mini-muffin tin with foil. Grease the foil with cooking spray.

Put about a teaspoon of the brownie batter in each muffin cup. Then, drop about a half-teaspoon of the peanut butter mixture in each cup. Top each cup off with another teaspoonful of the brownie batter.

Bake for 20 minutes. Allow to cool completely before peeling the foil off of each brownie bite.

move over, general mills


Anybody can make their own pancakes or waffles. My friend Katie Rice makes her own cereal. Why? Because she and her husband are too cheap to buy real cereal! I think this is the greatest reason to make your own granola, ever.

Anyway, Katie Rice, adding that many variations are possible, gave me her granola recipe. Sometimes, she crushes some cardamom pods in the liquid ingredients as they are heating. I decided that cardamom smelled like tea, so I left it out. (I do NOT like tea.)

She also said she sometimes adds nuts. (I used pecans because I had them, and I think sliced almonds would be delicious.) Other times, to the dismay of her husband Kyle, she throws in some golden raisins, too. I assume the best time to do this is at the very end, after the granola is cool. If I were more industrious and less knocked out by allergies, I would have used my food dehydrator to make apple chips or dried strawberry slices.

Fresh banana slices also taste great on the granola, but I have found the best way to eat this breakfast. In my fridge, I have a ganache that turned out much runnier than I'd planned. (Equal parts boiling heavy cream and white chocolate chips, stirred until incorporated.) Forget milk. Pour the ganache-sauce over the granola, and presto-chango, you have dessert!

Granola

Preheat the oven to 300.

1 stick butter, melted
5 cloves
1 Tbs vanilla
2 Tbs water
1/4 cup honey
1/4 cup brown sugar

Stirring to combine, heat the above ingredients until everything is melted. Do this over low heat for about 10 minutes to let the cloves flavor the mixture.

2 cups rolled oats
1/2 cup wheat bran
1/2 cup crushed pecans
1/2 tsp nutmeg
1 tsp cinnamon
1/4 tsp salt

Mix the dry ingredients in a large bowl. Pour the wet ingredients into the bowl through a strainer to remove the cloves (& optional cardamom pods). Stir until everything's combined.

Spread on a baking sheet and cook for 30-45 minutes, stirring occasionally.

Sunday, March 15, 2009

soup for you

Lately, the weather in Jackson has been a touch on the dreary side. Chilly and rainy - the perfect weather for soup.

It is rare that I have a craving for soup, but one of my favorites is Kaytie's French onion soup. I decided to try it out this week.

I learned two things. First, beef stock is best for this soup. I used a mixture of beef stock and rabbit stock (leftover from when we made rabbit stew). We'd used some different spices in that recipe, like cloves, that were not the best for onion soup. Stick with beef for a hearty soup with delicate flavor.

Second, it is very important to saute the onions until they are a deep, dark brown. I quit when mine were just a golden brown (had to get to work), and the soup was too sweet (probably had something to do with the rabbit stock, too). Be patient, and brown those onions.

Kaytie's French Onion Soup

4 onions, very thinly sliced
2 Tbs butter
3 cans beef stock
dash of Worcestershire sauce
splash of Madeira, red wine, sherry, or sweet vermouth
1 bay leaf
sliced Provolone or Gruyere

Melt the butter over medium heat. Add the onions and salt liberally. Saute over medium to medium-low heat for a long time, stirring occasionally to let them brown evenly. Once the onions are deep brown but not scorched, deglaze the pan with a splash of the alcohol. Add the beef broth, bay leaf, and Worcestershire sauce. Simmer over low heat, covered, for 20-30 minutes.

Serve topped with cheese, alongside some good crusty bread.

I made a couple baguettes, recipe courtesy of The Bread Bible. (If you haven't bought this cookbook yet, you are really missing out.) I couldn't resist closing with this picture...

Tuesday, March 10, 2009

back from brooklyn

So, I haven't cooked anything in the 48 hours since I've been back from my trip to Brooklyn (where I ate Trinidadian food--oxtails--yum!), so instead, I'm offering you a different sort of post today.
One of the things I love about my collection of old cookbooks is the delightful illustrations. I've been meaning to post some for a while, but I was afraid of running afoul of copyright law. (Can you tell I'm in law school?) After consulting with a friend who is an expert in intellectual property, I learned that I can post a group of the illustrations if I offer insightful critical commentary on their artistic merit.Such as, isn't this bunny picture adorable? I just want to squeeze its little tail! (Drew just called me a pervert.) No, seriously, I love the playful humor of these two pictures. The turtle one accompanies a recipe for turtle soup, and the bunny one is for a salad. Both are from the Esquire Cook Book, illustrations by Charmatz. Now, this picture can be found in My Stove is My Castle. (How much do you love the title of this cookbook? It was published in 1956 and has amazing authentic Mexican recipes for ceviche and huevos rancheros.) I cannot tell you why on earth there is a picture of a woman covered in birds in this cookbook, but I like it despite, or perhaps even because, it's such a non sequitur. The illustration is by Jacques Dunham.
This picture is so gorgeous. I love the stylized pen and ink, as well as the repetition of pattern and shapes. It reminds me of my days when I was an art teacher in Quitman County, Mississippi, desperately trying to teach my students the elements of art. This is from A Basque Story Cook Book, from which I cooked my roasted chickens and chickpeas. The illustrator is Marian Ebert. I think I picked this one for two reasons: first, because I love stippling, and second, because I am absolutely repulsed by frogs. This repulsion has spawned an equal fascination--like watching a train wreck, as they say. I can't look away. The detail amazes me. But I promise that I will never cook the Frog Legs Provencal recipe that this picture accompanies. Both the picture and the recipe can be found in The New York Times International Cookbook, illustrations by James J. Spanfeller.

Finally, I leave you with this beautiful picture from The Spice Islands Cookbook, illustrations by Alice Harth. Drew and I love the pictures in this one so much (though unfortunately not the recipes) that we cut them out with a razor and matted and framed them to hang in our kitchen. The style of illustration reminds me of the style of animation in my two favorite animated movies--The Rescuers and Gay Purr-ee. (I love Gay Purr-ee. Newsweek said of it in 1962, "There seems to be an effort to reach a hitherto undiscovered audience - the fey four-year-old of recherche taste.")

In sum, I wish cookbooks were a showcase for artists like they used to be. I promise that should we publish a cookbook, we will fill it with fun, kitschy illustrations. In the meantime, enjoy these instead.

Sunday, March 8, 2009

cookies from the garden

Mom was sneaky. When I was a kid, she used to make brownies with grated zucchini hidden in them. We would never know if her brownies were laden with nasty veggie vitamins or if they were simply safe, empty calories. (Truth be told, the zucchini brownies were good, though it's taken me a while to fully trust desserts.)

I got to thinking this week. Could I disguise a vegetable in a tasty dessert? Might my children one day mistrust my cookies?

The answer is a resounding yes. These carrot cookies (holy cow, they're awesome) are incredibly delicious. I cannot recommend them highly enough.

Carrot Cookies

1.5 sticks butter
1 cup sugar
1 egg
1/4 cup molasses
2 tsp baking soda
1 tsp allspice
1 tsp cinnamon
2 cups all-purpose flour
1/2 cup raisins
1.5 cups grated carrots

Preheat the oven to 375.

Mix together the butter, sugar, egg, and molasses until smooth. Beat in the soda, allspice, cinnamon, and flour. Stir in the raisins and carrots.

Drop heaping teaspoonfuls of dough into a bowl of granulated sugar. Roll the dough into a ball, covering it in sugar as you do so. Place the balls on a cookie sheet lined with parchment paper, about 2 inches apart. (If you lack parchment paper, just grease the cookie sheet.)

Bake for 9 minutes. Cool on the cookie sheet for a minute or two before moving the cookies to a cooling rack.

And now for something completely unnecessary...

In keeping with the carrot cake theme, Kaytie had the brillant idea of icing the cookies. Of course! Cookies couldn't possibly be complete unless you turn them into little icing sandwiches.

Okay, the cookies are plenty good by themselves, but they are nice with icing, too.

Cream Cheese Icing
(If you're icing a cake, you probably need to double this recipe.)

1 8-oz block cream cheese, room temp
1 cup powdered sugar
1/2 cup white chocolate chips
1 Tbs milk
1/8 tsp almond extract

Beat the cream cheese and sugar together until smooth.

In the top of a double boiler, add the milk and chocolate chips. Do this over medium heat. Do not let the water in the bottom boil. Do not let the hot water touch the bottom of the top pan. (I know - it's a lot of rules. They're for your own good.) Stir constantly as the chips melt.

Once the chips are melted and combined with the milk, add the mixture in a steady stream to the cream cheese mixture as you continue beating. Add the almond extract. (You may want to add a little more extract if you like a stronger flavor. Taste as you go.)

Once it's all mixed together, spread a layer on the bottom of a cookie, and top it with another cookie. Ta da!

Iced cookies should be kept in the fridge.

Thursday, March 5, 2009

c is for...


For Lent, I gave up caffeinated drinks and sweets that I haven't made myself. (I'm all about the fine print.) Well, this week, I got a craving for some cookies, and after my success with the billionaire cookies, I decided to make up a new cookie recipe.

I'm pretty pleased with myself. I even took these cookies to work to show off. The apple cinnamon flavor is faint, almost delicate, but not overpowered by the peanut butter. They also kept remarkably well - stayed soft until they were gone.

Apple Cinnamon Peanut Butter Cookies

1 cup peanut butter

1 tsp vanilla

1 egg

4 Tbs (1/2 stick) butter

1 cup brown sugar

3 Tbs milk

1.5 tsp cinnamon

1/4 tsp nutmeg

1/4 tsp salt

1.5 cups self-rising flour

1 Granny Smith apple, peeled & diced fine

Preheat the oven to 350.

Combine the peanut butter, vanilla, egg, butter, sugar, and milk. Mix until smooth. Stir in the cinnamon, nutmeg, and salt. Add the flour and mix well. Finally, fold in the apple bits.

Roll scoops of dough into balls that are about an inch or inch & a half in diameter. Place them on a greased cookie sheet, and use a fork to press them flat, creating the classic criss-cross.

Bake for 10-12 minutes and cool on a rack.

Makes about 52 cookies.

Wednesday, March 4, 2009

henny & penny are not forgotten

Sometimes, you should sit back and take stock. No, wait. You should sit back and make stock.
Why?

1. Because it makes you feel like a pioneer.
2. Because it's cheaper than buying a couple gallons of chicken broth.
3. Because it's easy.
4. Because your freezer is too empty.
5. Because rice (or oatmeal) cooked in chicken broth is way better than rice cooked in water.
6. Because it's better than just throwing those bones away.

Our first stock used post-Thanksgiving turkey bones, and we currently have rabbit stock in the freezer. We make chicken stock whenever we have chicken bones laying around.

After Kaytie roasted Henny and Penny, we put the bones in a baggie and tossed them in the freezer. We've also been saving various vegetable leavings (like leek tops and parsley stems), and on Saturday, I finally got fed up with the random bags in the freezer. I made chicken stock.
This is an easy task, and it makes a lot of stock. You need a really big pot. A stock pot. Actually, I use a tamale pot, because the thing is huge. Anyway, put the chicken bones in the pot. Chop 2-3 onions into large chunks and toss them in. Do the same for some carrots and celery. I always peel and cut up a rutabaga, too. (Someone once told me that it was good for stock, and I believed it.)

In case you haven't noticed, this recipe is not going to provide exact directions. You don't need them. Start with the carrots, onions, celery, and rutabaga, and then add anything else that sounds good. Like a couple bay leaves. I'd stay away from salt & pepper. (You can season the stock later, when you're actually cooking with it.) You should probably go easy on strongly flavored stuff, too, like garlic. In this last batch, I threw in some green onions, leeks, parsley, and turnip shavings.

Fill the pot with water so that it covers all of the bones and veggies. Bring it to a boil and then turn down the heat to medium or medium-low. Let it simmer, covered, for several hours. You can give it a stir and check the color of the stock every once in a while. When it's as dark as you want, turn off the heat and let it cool. (I probably cooked this one 3-4 hours.)

Strain out the bones and veggies, and, using cheesecloth, skim off the fat that might be floating on the surface. Divide the stock into manageable (2-3 cup) portions (like those Gladware or Ziploc containers), and freeze. When you're ready to use it, you can heat it in the microwave until it's thawed completely.

Monday, March 2, 2009

pasta and gremlins

Yep, I made pasta from scratch Sunday night. I had a new gadget that I wanted to try.

Actually, it's a used gadget. Every once in a while, my manager Kristina goes through her pantry and makes space by donating her old kitchen stuff to me. Mixing bowls, spatulas, Calphalon pans, and a pasta maker. All of which is greatly appreciated.

To tell the truth, I'm not sure linguini from scratch is much better than dried linguini from the store. It's cool to say the pasta's fresh, though. (I'm also pretty excited about the idea of making flavored pasta, like dessert spaghetti with ice cream meatballs...)

What was notable was the gremolata I made as a condiment for the pasta. (It was Kaytie's idea, but I made it and called it the gremlin, which only I found funny.) It's an Italian thing, and it adds a little citrus zip that is especially nice on a creamy dish. (We use some on a tenderloin tips risotto at work.) It was great on the shrimp pasta, and I'm planning on using the leftovers on Kraft mac and cheese.

Gremolata

1 cup pecans
1/2 cup grated Parmesan
1 large clove roasted garlic
4 tsp lemon zest
4 tsp chopped basil
4 tsp chopped parsley
1/4 tsp black pepper

Dump it all in a food processor and pulse until all is well combined and chopped.

Sunday, March 1, 2009

skrimp pasta

Usually Drew and I like to use Sunday nights for trying challenging new recipes, but sometimes it's nice to do something easy for dinner. This shrimp pasta (or skrimp pasta, if you're from the Delta), for example, is simple. Now, Drew did make the pasta from scratch, but that's another post. And it's certainly not necessary for this recipe.

This pasta is easy (as previously stated), delicious, and absolutely terrible for you. There's not much else to say about it. We topped the pasta with a homemade gremolata, which Drew will tell you all about when he tells you about homemade pasta.

Skrimp Pasta

1/2 stick (4 tablespoons) butter
1 white onion, minced
1 can diced tomatoes, drained
1 tsp fresh basil, chopped
1/8 tsp dried thyme
pinch pepper
1 pint heavy cream
1 can quartered artichoke hearts, drained
1 10 oz. bag of medium-sized frozen shrimp, peeled and deveined
salt to taste

Defrost the shrimp.

Melt butter in a medium sauce pan over medium heat. Increase heat to medium high and add onions. Cook until onions are golden. Add tomatoes, basil, thyme, and pepper. Saute for around 5-7 minutes, stirring frequently. Remove from heat and blend, either with a stick blender or in small batches in a blender. Once tomato mixture is smooth, add cream while blending but do not blend too long or you'll whip the cream. Put the cream-tomato mixture back on the heat. Turn heat up to high until it comes to a boil. Once it does, turn heat down to low and let simmer until the mixture is reduced by half. Add salt to taste. Then add the shrimp and let shrimp hang out in the sauce until cooked through, 5-7 minutes (at most! It depends upon how hot the sauce is...check the shrimp often because it doesn't take long to overcook them and then they're tough and gross). Add the artichoke hearts. Pour over 1 1/2 pounds of cooked pasta (again, fresh or dried, who cares?) and serve immediately. Let your guests top with gremolata.