FREE counter and Web statistics from sitetracker.com

Saturday, January 31, 2009

mixing memories of momma with indian flatbread

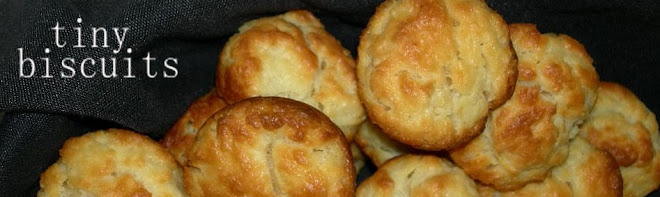
My mother really loathes cooking. This is something I don't understand at all, because she likes eating. Now, you might think, wait a minute, everyone likes eating. Not so. Some people (people who are generally not my friends) eat just because they have to. I taught with a couple named Eric and Melissa that were like this. They were nice people, but they lived off of hot dogs. (Really--they told me once that their monthly grocery bill was $50! I spend more than that in a week.) The kicker is that they were really thin. Why? Because they just didn't care enough about what they were eating to stuff themselves with it.

Anyway, so I understand why people like Eric and Melissa don't get into cooking, but my mother? She loves good food, yet she sees the kitchen as a prison. Maybe it's a generational thing. Maybe because Drew doesn't expect me to have dinner on the table waiting for him every night, I can enjoy cooking.

Now, just to say that Momma doesn't like cooking doesn't mean that she can't make some things well. When my sister was asked by her preschool teacher what her favorite meal my mother made was, she proudly answered, "My Momma makes the best sandwiches!" And she did--she made all kinds of interesting sandwiches--cream cheese and jelly, for example. And this brings us to today's first recipe: egg salad.

My egg salad recipe is, of course, more complicated than my mother's, because I can't ever seem to make something simply. So I'll tell you how she made it, and how I changed it, and you can do it the way you want.

Egg Salad

6 eggs
1/2 cup mayonnaise
1 piece of Laughing Cow garlic & herb cheese
1/2 teaspoon mustard
squeeze of fresh lemon juice
black olives
green onions, chopped

Put the eggs in small pan and cover them with cold water. Cover the pan and bring to a boil. Remove from heat and let stand 10 minutes. Then, uncover and drain, and put the eggs in a bowl of cold water. When they're cool, peel them. Then chop them up fine. Momma has a special tool for this that I covet and hope she leaves me in her will.
While the eggs are cooling, you can make the mayonnaise sauce. Now, my mother just mixed the mayo and the mustard and the eggs and that was that--egg salad. I mixed the mayo and mustard and the lemon juice and the Laughing Cow cheese (in fact, I blended them all together with my immersion blender because I love that thing). Then I mixed that into the eggs and topped with black olives and green onions. I have to say, I like mine a little better, but it is more of a pain to make.

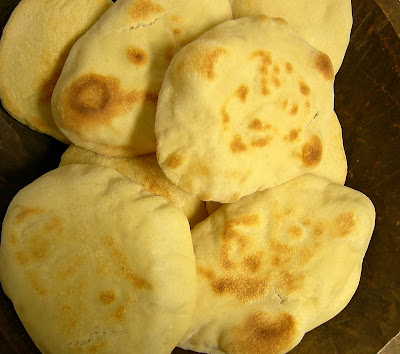
Now, what to eat the egg salad on? Wheat Thins, Triscuits, sandwich bread, pita bread: all good options. However, I had none of these. I didn't want to eat it by itself, so I had to make something. I needed a quick, easy bread, because I am not the baker of the family. I found the perfect solution--naan!
Naan is Indian flat bread. It's kind of like pita bread but moister and chewier. This recipe is so simple, and it was very good with egg salad, though definitely not what my mother would have served egg salad on. It made a lot, too, so I can bring some to Tott, who is gradually recovering from something akin to the plague.

Naan Bread
1 1/2 cups warm (not hot) water
1 tablespoon sugar
2 teaspoons active dry yeast
1 teaspoon salt
1 tablespoon onion powder
1/8 teaspoon cumin powder
3 cups flour, plus some for kneading

Combine the water, sugar, and yeast in a bowl. Let stand for 5 minutes until foamy on top.
In a separate bowl, mix salt, spices, and flour together. Mix with a wooden spoon, then turn out onto a well-floured counter top. Knead dough into a tight ball. Put dough in a well oiled bowl and cover with a damp towel. Put the bowl in a warm place and let rise for about 30 minutes. It won't rise much, so don't worry. Divide up the dough into little balls and roll into circles about 1/8 of an inch thick. Grease a frying pan (I used olive oil, but you could use Pam--I wouldn't use butter because it might burn) and get the pan nice and hot. Put 1 or 2 naan in the pan at a time, and grill for about 2 minutes per side. The thinner you roll the naan, the puffier they get.

fusion tabouli


After making kibbee, we had a bunch of soaked bulgur wheat left over. What better way to use it than making tabouli?

I, however, have a confession to make. I've never much cared for tabouli. I really only eat it spooned lightly over a pita spread with hummus. Also, I don't remember exactly what Mom puts in her tabouli. So, I made tabouli with extras. It turned out tasty, light and fresh, and the edamame adds a nice crunch. Good enough to eat on its own.

Tabouli with Extras

(don't know what to serve your vegetarian friend? make this!)
about 2 cups of washed and soaked bulgur wheat
1 bunch of parsley, chopped fine (I used the food processor)
1/4 of a red onion, diced fine
1 cup of edamame (removed from the pods)
1 can of diced tomatoes, drained
about 1 tsp of kosher salt
about 2 Tbs of salad oil
lemon juice to taste
Drain the tomatoes extremely well. I dumped them in a colander and, like the hokey-pokey, shook them all about. Tomato juice was all over the sink, but I wanted these suckers to be as dry as possible. (Note: tomatoes from the garden would be better, but, because this is January, our garden is barren.)
Combine the parsley, bulgur, onion, edamame, and tomatoes in a bowl. Come to think of it, just put everything in the bowl, except for the lemon juice. (Olive oil would probably be better than salad oil, but you work with what you've got. I also added a little white pepper.)
Give it a good stir to get everything mixed together, and then begin adding the lemon juice, stirring and tasting as you go. Once you get enough juice, the flavor will be nice and bright.

Wednesday, January 28, 2009

one from the vault: game day food

This post wasn't inspired by something I cooked today. No, it was something I read.

The Recipe Girl is hosting a game-day snack contest, and I have the perfect recipe, though it wasn't specifically developed for a football game.

At our Christmas party this past year, we served creole-inspired food. One of the favorites was a play on my sister Sara's jalapeno poppers. We decided to stuff the peppers with a jambalaya mixture, and it was delicious.

Jambalaya-Stuffed Jalapeno Poppers
(a Kaytie & Drew original)

Jambalaya Stuffing:

2 tablespoons vegetable oil
2 cups chopped onions
1 cup chopped bell pepper
1 chopped jalapeno
½ cup chopped celery
Salt and cayenne pepper
4 bay leaves
2 cups of canned chopped tomatoes, peeled and seeded
1 can Rotel
1 lb. andouille sausage, diced small
1 tablespoon chopped garlic
1 cup white rice
1 ¾ cup chicken stock
1 cup chopped green onions

In a big pan, heat the oil. When hot, add the onion, peppers, and celery. Season with salt and cayenne. Saute the veggies for about 5 minutes, or until wilted. Add the sausage and sauté for 2 minutes. Add the bay leaves, tomatoes, Rotel, and garlic. Saute for 2 minutes. Stir in the rice and sauté for 2 minutes. Add the stock. Season with salt and cayenne. Bring liquid to boil and reduce to a simmer. Cook 25 to 30 minutes covered. Stir in green onions.

(Please note: you can eat the jambalaya now, if you wish.)

Poppers:

25 jalapenos, cut in half and seeds scraped out
1 package of turkey bacon
Toothpicks
Jambalaya
1 package of cream cheese

Mix the jambalaya with the cream cheese. Fill the jalapeno halves with the jambalaya and cream cheese mixture. Wrap ½ a piece of turkey bacon around each half and secure with a toothpick. Bake in oven, on a rack on a cookie sheet, for 10-15 minutes at 350 then broil for a couple minutes until bacon is crispy. Watch the poppers closely while broiling.


!BONUS RECIPE: The Original Poppers!

jalapenos (get a lot - they'll go quickly)
turkey bacon, cut in half
fat-free cream cheese

Cut the tops off the jalapenos and split them lengthwise. Scrape the seeds and ribs out. Spread the cream cheese in the hollowed-out peppers, and wrap each pepper in half a slice of turkey bacon. Secure the bacon by sticking a toothpick through the popper.

Put the poppers on a rack (like a rack used for cooling cookies) placed on a cookie sheet. (Line the cookie sheet with foil for easy clean-up.) Bake at 350 for about 10 minutes, and then broil for 3-5 minutes to make the bacon crispy. Keep an eye on them while broiling, though, so you don't burn them. Salt the poppers lightly before serving.

These are delicious and actually good for you. Like vitamins.

Tuesday, January 27, 2009

meat brownies

I wish I could remember who coined the term 'meat brownies' as a nickname for kibbee. It's genius.

Anyway, I've made kibbee several times before, and it was good. It was not, however, as good as this kibbee that Arthur made Sunday night. He does have the advantage of real Lebanese blood running through his veins, but I also think he has a better recipe. Here it is.

Aunt Adelle Rice's Kibbee-slightly modified

2 lb. lean ground beef, ground twice
3 cup burghol
1 tsp allspice
1 tsp cinnamon
1/2 tsp black pepper
1/2 tsp white pepper
2 tsp salt
1 medium onion, pureed
1 cup rendered butter

filling (hashwy)

1.25 lb ground lamb
1 tsp allspice
1 tsp cinnamon
1 tsp white pepper
1/2 tsp Aleppo Pepper
1 medium onion, diced
2.5 Tbs pine nuts

Preheat the oven to 350. Wash and soak burghol for 30 minutes.
In a frying pan, brown the hashwy mixture over low to medium heat until the meat is half done. Set it aside.
Squeeze excess water from the burghol, and place in a large bowl. Mix kibbee ingredients together in the bowl. Knead until thoroughly mixed. Use cold water to keep hands moist and to keep the mixture from sticking to your hands.
Split the kibbee into 2 equal halves. Place the first half of kibbee in an 8 x 12 pan greased with butter or cooking spray. Spread the meat evenly. (The best way to do this is to make 'hamburger patties' and place them in the pan, smoothing their edges together to make one layer of meat.) Place the filling in the pan and spread evenly. Place the second half of the kibbee mixture on top to cover the other layers. (Use the hamburger method, but be careful not to push them down too much.)
Use a sharp knife to cut the kibbee into diamond shaped pieces. Pour cup of rendered butter over all kibbee.
Bake at 350 for 35-40 minutes, and then broil for about 3-5 minutes. Remove and serve.
Of course, we had to have some bread to go along with our meal. And what would be more appropriate than pita bread? Time to call in The Bread Bible!
Two things: I went out and bought a baking stone to use to cook these, and I love it. Also, I'll give the measurements in volume and in ounces - I've started weighing the ingredients, and it has worked beautifully.

Pita Bread
(from The Bread Bible)

3 cups (plus a scant 1/4 cup) or 16 oz. of unbleached flour - I recommend King Arthur.
2 tsp salt
2 tsp instant yeast - I'm using Fleischmann's Rapid Rise.
2 Tbs olive oil
1.25 cups water, at room temp (70-70 degrees)

At least 8 hours (or up to 3 days) before shaping the pita, mix the dough. (I let mine rise for 2 days. The longer it rises, the more the flavor develops.) Combine the flour and salt in the bowl of a stand-up mixer before you add the yeast. This will keep the salt from directly contacting the yeast and killing it. Add the yeast, olive oil, and water. Use the paddle attachment and mix on low speed briefly, just until the flour is moistened. Switch to the dough hook and knead the dough on medium speed for 10 minutes. The dough clean the bowl and be just a little sticky to the touch.

Use a lightly oiled rubber spatula to scrape the dough into a 2-quart (or larger) greased bowl. Press the dough down and oil the top of it. Cover the bowl with plastic wrap, and put it in the fridge. Check it every hour for the first four hours, pressing it down if it starts to rise. I actually only pressed it down once, because I had to go to work. It was fine.

Put a baking stone or iron skillet on the lowest shelf of your oven. Let the oven preheat to 475 for at least an hour.

Cut the dough into 8 or 12 pieces. (Work with only piece at a time, keeping the others under a damp towel.) Shape each piece into a ball and flatten into a disk on a lightly floured counter, using lightly floured hands. Cover the disks with lightly oiled plastic wrap (it is almost impossible to oil plastic wrap neatly) and let them rest at room temperature for 20 minutes.

Roll each disk into an approximate circle. The circles should be a little under 1/4 inch thick. Let them rest, uncovered, for 10 minutes.

Quickly toss the dough circles on the baking sheet, 3 or 4 at a time. Bake for about 3 minutes. The pitas should puff (mine were like balloons), abut not really turn brown. I flipped mine and cooked them for an additional minute, but I don't think this is necessary. Let the oven reheat itself for 5 minutes between batches.


Keep the pitas wrapped in a towel before serving. They can be warmed briefly in the oven, which makes them even more delicious.


Now, what to do with those leftovers?

Sunday, January 25, 2009

sunday night suppers: vaguely lebanese

Tonight, we hosted six of our friends for another Sunday night dinner. This time our friend Arthur, who is a prolific cook himself, wanted a piece of the action. Because Arthur is Lebanese, he suggested we do a Lebanese-inspired dinner.

Little known fact: Mississippi, where we happily reside, has the highest per capita Lebanese population in the United States. At least, that's what all my Lebanese friends tell me.

Arthur came over early, and he and Drew made kibbee, which Drew will have to tell you about later (preview: it was amazing. Arthur's grandmother spoke through him as he worked the allspice and cinnamon into the lamb.) Arthur left me in charge of the side dishes and dessert. Actually, Arthur brought me recipes and ingredients to make certain side dishes, but rebel that I am, I changed them up. I think I can legitimately call these dishes my own.

The picture at the top of this post is of kale. I made kale because Arthur told me to--but the recipe Arthur gave me was incomprehensible. It was for a stew made only of swiss chard stems (um, yuck). Yet he brought me kale, not swiss chard (what?). I did with it what I could, which I was pleasantly surprised with. It was true improvisation, though, so the measurements listed here are approximations. Follow your heart.

Kale with Lentils

1 cup lentils
2 bunches of kale (about 6 cups chopped)
chicken broth
pinch of sugar
juice of 1/2 a lemon
pinch of sumac
1/2 link of smoked sausage
1 onion, minced
3 cloves garlic, minced
butter

Cover lentils with chicken broth until about an inch of fluid is above the lentils. If you don't have enough chicken broth, which I didn't, use water to make up for what you don't have. Bring the lentils to a boil, and boil for around 20 to 30 minutes. Then, just put the chopped kale on top. Sprinkle it with the sugar, sumac, lemon juice, and salt and pepper. Just use a pinch of sugar--it cuts the bitterness of the greens. Cover the pot. As the lentils boil, the kale will steam on top. In a separate pan, saute the onion and garlic and sausage in butter. Once the onions are translucent and the sausage is a little browned, dump those on top of the kale. Stir the kale, lentils, and other good stuff. Cook covered over low heat for another, mmm, 15 minutes or so? I don't know. Cook until it tastes done.

Leeks and Rice
serves 6-8

6 leeks, dark green part cut off, diced and rinsed well
2 onions, minced
1/2 cup olive oil
2 teaspoons flour
1 teaspoon salt
1 teaspoon sugar
1 1/2 cups rice
3 cups chicken broth
sprinkle of dried red pepper flakes
1/2 lemon

Heat olive oil over medium heat. Add onion and let soften, about 4 minutes. Sprinkle flour, salt, and sugar. Stir for about a minute. Add broth. Bring to a boil, stirring vigorously. Add rice and leeks and pepper, cover and reduce heat. Simmer for about 1/2 an hour. Squeeze lemon over rice and serve.

Now, the last recipe I'll post from tonight is for baklava. I was not told to make baklava. I did that all on my own. No one complained.

It was good, though phyllo dough is one of my least favorite ingredients to work with. It tears, it breaks, it ends up in shreds. But, fortunately, that's good for baklava.


Baklava

Have Tott crack a large amount of pecans, probably around a pound, while watching How I Met Your Mother. Take those pecans and lightly toast them. Then give them a few swirls in the food processor until they're finely chopped. Add ground cinnamon and a little sugar to your pecans.

Take the phyllo dough out of the freezer. Now, you start to make the syrup that will be poured over the baklava. This makes it sticky and finger-licking good. Put a cup of sugar in a pan with a cup of water. Bring to a boil, and boil until clear. Add 1/2 a cup of honey, a cinnamon stick, 1 teaspoon of vanilla, and 2 cloves. Simmer for around 20 minutes. Cool.

While the syrup is simmering, melt about a stick of butter in the microwave. Brush a sheet pan with some of the butter. Now take the defrosted phyllo dough. Put a layer of dough on the pan. Brush with butter. Repeat 8 times. Now spread the pecan mixture over the dough. Add 8 more layers of dough brushed with butter. Score the baklava with a sharp knife into diamonds or squares. Bake for 35-40 minutes at 350, or until brown. Take out of oven and evenly pour cooled syrup all over the baklava. Let cool, cut, and serve.

As you can see, I was a busy girl. I am exhausted. And I'll post Tott's Cream of Artichoke soup, which was delicious, as soon as she gives me the recipe. (Tott, I am not ignoring your soup. I really did like it.) Drew will tell you more later, I promise.

Wednesday, January 21, 2009

the whole story: a response to kaytie's puff pastry challenge post

First of all, you should read Kaytie's post. Once you're finished, come back to this post to hear the whole story.


One thing that should be noted is that Kaytie had an unfair advantage. Just look at this shirt her sister made. They were clearly trying to psych me out.


There's another important detail that Kaytie just happened to omit. Though her brie and honey turnover did win for best dessert, Kaytie forgot to mention that, when all of the points for all of the desserts were totalled, there was an overall tie!


Besides, how creative is brie and honey? That's just a cheese plate. My number one pastry was a sweet potato pie turnover with candied bacon. Candied bacon!!


Candied Bacon

thick-cut bacon
brown sugar
baking sheet
one of those racks for cooling baked goods

Line a baking sheet with foil and put the cooling rack on the baking sheet. Dredge the bacon in a bowl of brown sugar, and lay the bacon on the rack. Sprinkle more brown sugar on top of the bacon. Bake at 325 for about 10-15 minutes, checking to see when the bacon is crispy. Allow the bacon to cool before eating. Enjoy!


We'll keep you posted on the outcome of the next challenge. I'm predicting a victory. A victory for me.

one from the vault: puff pastry challenge 3000

Even though the famed Puff Pastry Challenge 3000 happened this past fall, I thought it'd be nice to tell you about it here so you can have access to the winning recipe.

First, the Puff Pastry Challenge 3000 was a showdown between Drew and me for the title of best turnover. We served them head-to-head to a panel of 4 judges, including Tott, and they filled out scorecards.I made a green apple & caramel turnover, a pumpkin marscapone turnover, and a brie & honey turnover. Drew made a nutella & marshmallow turnover, a cherry & pineapple turnover, and a sweet potato & candied bacon turnover.

This little beauty, the brie & honey turnover, won. Of course, I shamelessly pandered to the judges--I happened to know that both my sister and Tott are cheese-aholics. I couldn't go wrong with Brie. Nor, for that matter, can you. These are easy and would make fantastic first courses or dessert courses. In fact, they're a kind of cheese course/dessert course rolled into one. Efficiency!

I'd serve them with a nice tawny port or a madeira, but that's probably just because I happen to like those drinks, not because I understand the nuances of wine pairing.

Brie & Honey Turnovers--Winner of the Puff Pastry Challenge 3000

1 package of brie, rind cut off
1 cup of dried cherries
1 cup fig preserves
toasted walnuts pieces
honey
puff pastries

Turnovers:
Defrost puff pastry. Roll out onto floured work surface. Cut puff pastry into circles with a cookie cutter or a glass. Roll each circle out until slightly thinner and bigger with a rolling pin or a glass. Store in fridge.

Put dried cherries in hot water and a spoonful of brandy to let rehydrate. Drain. Take puff pastries out of fridge. Add 2 spoonfuls of brie, a little fig preserves, a few rehydrated cherries, and a few walnuts. Brush egg white around the edges of puff pastry, then fold gently in half. Crimp edges closed with tines of fork. Poke a few holes in top of pastry to let steam escape. Bake on paper-lined baking sheet according to puff pastry package instructions. When finished baking, pour honey over the top of each pastry and garnish with more walnuts.

Look how sad he is! Mwah ha ha! He, of course, demands a rematch. Next time, I think it will be an amuse bouche (appetizer for you country folk) challenge. I shall prevail again.

Monday, January 19, 2009

orts revisited

After making enough food to feed an army last night, I have a lot of leftovers. I don't mind leftovers, but I prefer to rework them into new(ish) dishes.

I think I'm going to make the leftover chicken into a chicken salad tomorrow, and I'm torn between this recipe and this one for my leftover garbanzos. I froze the carcass to make stock & chicken gumbo. And tonight, I used the rest of the pepper coulis and some of the leftover chicken in a pasta. Drew approved.

Pepper Coulis Pasta

1 cup dried elbow macaroni
1 can brined artichoke hearts, drained and chopped
1 red onion, diced
1 green bell peppers, diced
1 cup chopped cooked chicken
1 tablespoon mayo
shredded mozzarella
1/4 cup parsley

Bring a whole lot of water to a boil. Add the pasta and cook until al dente. In the meantime, saute the veggies until browned. Add veggies and chicken and parsley to pasta and toss with leftover coulis and mayo. Sprinkle with cheese and serve. Easy, huh?

sunday night supper: all the fixins

So, Drew told you about the bread, and I told you about the chicken, but it takes a whole 'nother post to finish telling you about the delicacies we enjoyed last night. The chicken was served atop a bed of Basque-flavored garbanzo beans with a pepper coulis.

Usually I just make garbanzo beans from a can, but I decided to try dried beans for Sunday Night Supper. I bought a 1 lb. bag of beans and soaked them overnight in water and 1 tsp. of salt. Then, Sunday morning I boiled them. When you bring them to a boil, all of this weird foam will accumulate on the surface of the water. You need to skim that off until the water becomes clear.

Then, drop in a minced onion, a minced clove of garlic, 1/2 a can of tomato sauce, a bay leaf, a tiny jar of pimentos, and 1 tablespoon of olive oil. Reduce the heat to low and simmer for 2 hours.

Once the beans are cooked, drain them and put them in the bottom of the casserole dish that you cook your chickens in. The chicken jus will coat the beans as the chickens roast, and the beans turn out really delicious. I tossed them with 1/2 cup chopped parsley and a bunch of green onions to serve.

The beans would be good just like that, but they're even better with my Roasted Pepper Coulis.

Roasted Pepper Coulis
(a Kaytie original)

2 red bell peppers
1 yellow bell pepper
1/2 can tomato sauce
1 clove of garlic, roasted
3 tablespoons butter
1 teaspoon dried basil
1 teaspoon dried thyme
salt & pepper

Stick a pepper on a hot eye on the stove. You don't put it in a pot or anything; just put the pepper directly on the stove. Turn with a pair of tongs. Char the skin. Once the skin is blackened, rub the skin off. Repeat with each pepper. Then chop the peppers fine. Put them in a pot with a little butter and saute until very soft. Add the herbs, garlic, and tomato sauce. Saute a little longer to let flavors combine. Then blend (I use my stick blender, but you could put in a normal blender). After blending, add the butter a little at a time, whisking as you go. Then it's done, and you can put it on whatever you want--beans, chicken, pasta, your fingers.

I'd be remiss, however, if I didn't mention the excellent contributions of our Sunday night guests. First, Arthur made a tortilla. (He swears that the Spaniards call a frittata a tortilla. Whatever. It was a delicious frittata made with onions and potatoes. Wish he'd give me the recipe).

The tortilla/frittata made a great starter. Doug & Tott contributed excellent beer, and Eleanor brought some really tasty wine. It's a good thing no one had to work this morning. Oh, wait...

We ended the evening with Lindsey's Red Velvet Cake. While the cake may not be Basque or Spanish, who cares? It was so good. She made a homemade buttercream icing (or is it frosting?) that I could have eaten on its own for breakfast this morning. It was perfect: not too rich, not too sweet. It complemented the cake, rather than competing with it.


So, all in all it was quite a lovely Sunday Night Supper. See you there next week.

sunday night supper: how can I truss you when I barely know you?

Brace yourselves for a long post, because no matter what anyone may tell you, perfect roast chicken is not a simple, easy meal. It is, however, ridiculously tasty, so I might as well dive in and tell you how I made it.

Early last week, I decided that for Sunday Night Supper I would try a roast chicken & garbanzo bean recipe from The Basque Story Cook Book. Drew & I went grocery shopping in preparation for dinner where I was shocked at how cheap a whole chicken is. Four dollars! Four dollars for a whole chicken! That's two breast halves, two thighs, two legs, and all those yummy bones for stock-making. (I am very excited by my discovery: expect numerous future posts on ways to cook a whole chicken.) They were so cheap, I decided to cook two 4-lb. birds.

Here's the thing about roast chicken, though: there are a million different recipes. Some say roast slowly; others throw the bird into a 475 degree oven. Some say butter the skin, others say oil it, still others recommend mayonnaise. My own cookbook helpfully stated only, "Roast chicken for two hours." No temperature for the oven, no nothing. I was on my own.

First, I had to prep the chickens. This, my friends, is disgusting. Recipes tell you "remove the giblets." They do not tell you what that entails. Saturday night I was wrist-deep inside the chicken's slimy cold body, cutting bloody little chicken kidneys out. Then, I had to pluck whatever pin feathers remained on the skin with a pair of tweezers. You'd think the Tyson workers who are in charge of plucking these chickens would take care of that for you, but no, there were many feathers on both Henny and Penny (by this point, I felt so familiar with the chickens that I named them).

Next, I chose to brine Henny and Penny in hope of avoiding dry birds. Below are the ingredients for the brine:

Basque Roast Chicken Brine:

24 cups of lukewarm water
1 1/2 cups kosher salt
6 lemons, halved
1/2 cup crushed garlic
1 cup brown sugar
5 jalapenos, split
several bay leaves
2 tablespoons peppercorns
2 tablespoons dried basil
2 tablespoons dried cilantro
2 tablespoons dried thyme

Mix the ingredients together and submerge chickens for 6 hours. Then remove the chickens and put in the fridge uncovered on a rack over a cookie sheet. This dries the skin out, so that the skin can get crispy.

After letting Henny & Penny chill in the fridge for around 10 hours, I took them out. I stuffed them each with 1/2 a lemon, several crushed cloves of garlic, and whole sprigs of thyme. Then I rubbed each of them with a mixture of olive oil, minced garlic, kosher salt and pepper. I rubbed under the skin, too--another disgusting experience. After rubbing them down, I had to truss them. (Are you beginning to agree with me that this is not a simple dinner?)

So, after tying up the birds, I put the chickens in a large casserole dish on top of a bed of cooked garbanzo beans. I roasted Henny & Penny for 10 minutes at 425, then turned the heat down to 400 and roasted for about 20 more minutes. Then I took them out, and I learned that my meat thermometer had lied to me: the inside of Penny was still raw in places. Oh, no! I was distraught. But Drew reassured me and we just put the birds back in the oven and cooked them until the thermometer said 175 in the breast. We took them out, and oh, they were delicious. Even after cooking them twice, they were still juicy with crispy skin. Next time, I'll do them for 10 minutes, then 35 minutes and then check.

Sunday, January 18, 2009

ciabatta? you betcha

Kaytie wanted some crusty rustic bread to go along with her roast chicken dinner, so she suggested I make ciabatta. I agreed, but I was afraid. I was petrified. I knew I could never bake without you by my side...

No, seriously. I looked in the Bread Bible, only to learn that Rose Levy Berenbaum had to try ciabatta nine times before she figured it out. What chance did I have?
It was easy. Well, easy may be a bit of an overstatement. But because I had the Bible, I was able to make some delicious, airy ciabatta. (Also, I've been weighing my ingredients. I think it really helps.) I cannot recommend this book enough. Buy it.
I am not going to post the recipe I followed for ciabatta. You'll just have to get your own Bread Bible. (The only change I made to the recipe was letting the starter rise in the bathroom - it's the warmest room in our house.)

Thursday, January 15, 2009

a standing invitation

So, as previously mentioned, every Sunday Drew & I cook something new for whoever wants to come by. This Sunday the menu is roast chicken with garbanzo beans and spinach, and Drew's making homemade bread. Dinner's around eight. If you want to come, you might want to drop me a line so I know if we have enough food. Also, if you want to bring wine, we won't protest.

Wednesday, January 14, 2009

knives down, hands up

Tonight I finally had the chance to catch up on my Top Chef episodes. I had just sat down to ponder how Padma stays so skinny when I became really hungry. I had intended on just having a sandwich for dinner, but Top Chef gave me the itch to cook something new.


I looked through my pantry and refrigerator and collected what ingredients I had on hand. Since we haven't been to the grocery store in a little while, there wasn't much around to cook with. I was, however, not to be deterred. I'm glad I wasn't; I created a new recipe, and it rocks. You should make this. Seriously. It's delicious. What is it, you ask? Well, I don't have a name for it yet (in fact, I'd welcome suggestions). But, in a nutshell, I made some garlicky, lemony rice with artichokes, a cream sauce, and some chicken breasts. And seriously, it is delicious.


So that you can make it, too, here's what to do:

Unnamed Chicken and Rice
(a Kaytie original--serves 4)

Preheat oven to 300 and put a casserole dish in the oven. Now make the rice.

Rice:
1 cup real white rice (not instant rice)
1/2 cup minced red onions
1/3 cup minced red bell pepper
5 whole cloves garlic, peeled
1 can chicken broth
1 can artichoke hearts, drained and chopped
2 tablespoons lemon juice
1 bay leaf
1 tablespoon butter
1/2 cup pine nuts

Melt butter in a 2-quart sauce pan over medium heat. Add onions and pepper, and saute 3-4 minutes. Add the rice, the garlic, and the artichoke hearts, and saute another 2-3 minutes. Add the chicken broth, lemon juice, and bay leaf. Bring to a boil, then reduce to a simmer & simmer for about 15 minutes.

While rice is simmering, toast your pine nuts. (You can do this by putting them on a tray in the toaster oven, or by putting them in a dry small saute pan over medium to medium-high heat. Toast until light brown and they smell delicious. Pine nuts burn easily, though, so as soon as you can smell them, take them off the heat).
Once your rice is done, stir in the pine nuts. Put into the hot casserole dish, cover, and put back in the oven. Now you can cook the chicken.


Chicken
3 or 4 chicken breasts
pinch of dried thyme
garlic salt
pepper
butter
Melt a tablespoon of butter in a medium hot saute pan. Dry your chicken breasts well. Season with thyme, salt, and pepper. Put breasts in pan. Saute 2 minutes per side.

Now, put your chicken breasts on top of the rice in your casserole dish that's in the oven. Cover, and set the timer for 8 minutes. Now you can cook the sauce.

Sauce
1/2 cup cream
1/3 cup white vermouth (or dry white wine)
3 garlic cloves, minced
pinch of lemon zest
1 1/2 tablespoons butter
3 tablespoons capers

Melt butter over medium heat and add garlic. Saute around 3 minutes, then add vermouth and cream. Increase heat until sauce comes to a simmer. Simmer until reduced by half. Watch this sauce carefully--it will bubble over on you in a second! Add lemon zest and capers once reduced by half.

After your timer goes off, pull the casserole dish out of the oven. If your breasts are really thick, you might want to check one to be sure they're cooked all the way through; if not, put 'em back in for around 3 minutes. Once they're done, pour the cream sauce all over them and serve.

Seriously, this is delicious. If you're calorie-conscious (as I sometimes am--not tonight, though) you could omit the sauce and just top with lemon zest and capers. You could also use olive oil instead of butter. But, life's short. Indulgence is good every now and then. (Sorry, couldn't resist one more picture. I'm so proud. Sniff.)

Monday, January 12, 2009

black-eyed benedict

Kaytie had to work on a brief last night, so I was in charge of Sunday night dinner. I wanted to try a biscuit recipe, so I decided to do a brunch dish.


I'd also been wanting to try black-eyed pea cakes to see if we could involve them in some sort of appetizer for some future cocktail party.

And so, Black-Eyed Benedict was born. Black-Eyed Pea Cakes topped with poached eggs and hollandaise. (Kaytie said, "You're making hollandaise??" Sure, why not? I would soon learn that hollandaise is not so simple.)


Black-eyed Pea Cakes
(slightly modified from a recipe in Deep South Parties)


a couple slices of bacon
1/3 of a red onion, diced small
1/2 cup of green onion, sliced thin
1/2 cup of red bell pepper, diced small
1 jalapeno, seeded and diced fine
2 cloves of garlic, minced
2 tsp cumin
1/4 tsp Tony Chachere's creole seasoning
3 cups cooked and drained black-eyed peas
3/4 cup of bread crumbs
2 eggs


Cook the bacon, and set it aside. Use the bacon grease to saute the onion, peppers, and garlic for 4-5 minutes. Remove from heat.

Puree (until smooth) 2 cups of black-eyed peas with the eggs in a food processor.

Combine 1 cup whole peas, pureed peas, vegetables, seasonings, crumbled bacon, and bread crumbs in a mixing bowl. Shape into patties. (I used a borrowed crab cake mold, but the pea cakes could be smaller. Think bite-size.) Place the patties on a lightly greased baking sheet, and put them in the fridge for an hour.

Preheat the oven to 300.

Heat a couple tablespoons of olive oil in a saute pan. Brown the ckaes on each side for a couple minutes and put them back on the lightly greased baking sheet. Bake them for 10 minutes.

(If you make them bite-sized, the cookbook recommends topping them with a little sour cream and some roasted red peppers. I also took some of the pea cake mix and pressed it into a mini muffin pan to make little cups that could be stuffed.)

Poached Eggs
(instructions from the Joy of Cooking)


The Joy offers a couple methods for poaching eggs. My favorite uses about 3-4 inches of lightly salted water (boiling) in a greased 6-inch pot. Use a wooden spoon to "swirl the water into a mad vortex." (That's the actual language. How great is this cookbook??) The vortex will create a little well right in the middle of the water, and if you carefully slide the egg (broken into a bowl beforehand) into the well, the swirling will kind of round out the poached egg. Lower the heat, and simmer the egg for 4 or 5 minutes. Fish the egg out with a slotted spoon.


To poach more than one egg at a time, use a large skillet filled with about 1.5 inches of lightly salted water. Bring the water to a boil and then turn down the heat. After breaking each egg into a bowl, slide it carefully into the hot water. Simmer for 4 or 5 minutes before fishing out the eggs.


If you're poaching many eggs, they can be stored for up to 24 hours in ice cold water in the fridge. Just pop them briefly in warm water to reheat before serving.


(I also learned that it's hard to take a nice picture of eggs poaching.)


Hollandaise (dum dum dummm)
(recipe taken from The Book of Sauces)
3 egg yolks, at room temp
1 Tbs water
2 tsp lemon juice
3/4 butter, diced (3/4-inch cubes) at room temp
salt, white pepper, and paprika

Use a double boiler at low heat, making sure the water in the bottom pan doesn't boil or touch the bottom of the top pan. Whisk the yolks, water and lemon juice together until fluffy. Add butter one piece at a time, making sure each piece is incorporated before adding the next. Whisk constantly. Once all the butter is used, season with spices. Serve at once.

Okay. That's what the book said. I made this twice because it separated terribly the first time. Here's what I learned.

I first started with this rig.
After the sauce separated, Kaytie came to the rescue, suggesting a larger whisk and a bowl with steeper sides. That way, more of the sauce would be stirred with each stroke.

I tossed the first attempt.


Much better. I whisked while Kaytie added butter chunks. The sauce looked great, like real hollandaise. We hadn't used nearly as much butter as the recipe recommended, so I told Kaytie to add another piece. The sauce began to separate. Curses! It wasn't too bad, and our guests were ready to eat, so I used it. I would advise, however, that you keep an eye on your sauce. When it looks right, STOP ADDING BUTTER.


Black-Eyed Benedict (finally)


Once it was all together, it looked like this. The sauce wasn't perfect, but the flavors were great together. I'll do this again.

search for the holy grail of biscuits, part I

Touch-of-Grace Biscuits. Sounds delicious, no?


I have resolved, this year, to find the recipe for the perfect biscuit. I want to be able to make those fluffy, lightly browned biscuits that work with every meal in the South. And because I received three thorough bread cookbooks for Christmas, I have a plenty of possible recipes.


From The Bread Bible, I followed the recipe for the Touch-of-Grace biscuits. And I mean followed - I weighed the ingredients. With a scale. (How cool is that?) The only modification I made was using butter-flavored Crisco, because butter makes everything better.


Though they're not quite the biscuits I'm seaching for, I highly recommend these little guys. They'd be perfect at brunch.
(I served them with Black-Eyed Benedict - check out the next post)


Touch-of-Grace Biscuits


White Lily self-rising flour - 1.5 cups or 7.5 ounces
sugar - 3 Tablespoons or 1.3 ounces
salt - 1/4 teaspoon
vegetable shortening (cold) - 3 Tablespoons or 1.25 ounces
heavy cream - 1.25 cups or 10.2 ounces
all-purpose flour - roughly a cup, maybe less


Preheat the oven to 475 at least thirty minutes before baking the biscuits. Place a baking sheet on a rack in the middle of the oven as it preheats.


Whisk together the self-rising flour, sugar, and salt in a bowl. Add the shortening in tiny pieces (about a teaspoon size). Use your fingers to press the shortening into the flour until it's pea-sized or smaller.


Stir in the cream. The dough will be about the same consistency as mashed potatoes. Let it sit and stiffen up for a couple minutes.


Spread the all-purpose flour in a cake pan or on a cutting board. Use a large spoon or a small ice cream scoop (2 Tbl) to scoop heaping spoonfuls and drop them, one at a time, into the flour. Sprinkle a little flour on the top of the dough, roll it around, and shake the extra flour off. Shape the dough into rounds - mine were about 3/4 inch tall and 1.5 inches in diameter.


Put the biscuits into a lightly greased 8-inch cake pan. Pack them in close to each other; this will encourage them to rise up instead of spreading out.


Place the biscuits in the oven, on the baking sheet. Turn the heat up to 500. Bake five minutes. Turn the heat down to 475 and continue baking for 10 to 15 minutes (mine were light brown in 8 or 9).


Let the biscuits cool in the pan for a couple minutes before dumping them out. Eat!

Thursday, January 8, 2009

lunch

Seriously. A sandwich cookbook?

We were at Half Price Books in Dallas, sifting through cookbooks, and I ran across a one for sandwiches. Out of curiosity, I searched amazon.com, and there are tons of these books. Who needs a cookbook for sandwiches?


There are only a couple things you need to know to make a great sandwich:


1. Get some good bread, and toast it lightly.
2. Use interesting mustard.
3. Cheese. Any kind. Many kinds.
4. Use more meat than you think is necessary.
5. Serve with chips.


Hmm. That was more tips than I'd expected. Maybe I should write a cookbook.


To make any* sandwich better, use this easy olive salad. We have a jar of it in the fridge, and it's so good that Kaytie will eat it by the spoonful.

Olive Salad
(a Drew & Kaytie original)

1 jar of green olives
1 large can of black olives
1/2 jar of capers
1 handful of fresh basil
1 handful of fresh parsley
1/4 tsp (approx) of ground red pepper
1/4 tsp (approx) of ground black pepper
1 jalapeno
1/2 a red onion
4 cloves raw garlic
4 cloves roasted garlic
juice of 1 lemon
1.5 Tbsp dried oregano (fresh would better)
olive oil

Throw all of this into the food processor. Pulse repeatedly. Add the olive oil until the right consistency is reached. Enjoy on sandwiches full of cured meats.

*not recommended for peanut butter & jelly sandwiches

Sunday, January 4, 2009

Presto Chango Pomegranate Dressing

So, bed (and trial practice homework) looked less inviting than playing on the internet...thus, here is the aforementioned pomegranate dressing recipe.

They say necessity is the mother of invention...and because I forgot to buy Newman's Own Light Vinaigrette while at the grocery store today, I had to make my own salad dressing tonight. And guess what? It's tasty.* I served it on a salad of arugula, blue cheese, and spiced pecans. The dressing is pretty sweet, but it goes well with the blue cheese. Next time, I might put pomegranate seeds on top, too, though that might be too much pomegranate.

*I liked this dressing a lot, as did Tott, who ate three bowlfuls of salad. Drew, on the other hand, wasn't crazy about it. What actually he said was, "Something about this faintly reminds me of paint." Guess I'll be eating the remainder of the jar on my own salads.


Pomegranate Dressing

1 cup pomegranate cranberry juice
2 sprigs of rosemary
1 bay leaf
1 teaspoon fennel seeds
1/4 cup apple cider vinegar
1/2 cup roasted garlic flavored olive oil
salt & pepper

Boil the juice with the spices in it. Reduce until only 1/4 cup. Strain the spices out and put in a mason jar. Add vinegar and salt and pepper to taste. Add the oil and taste again to correct seasoning. Shake the mason jar before serving.

Sunday Night Suppers

"[Nothing] could change the color of Sunday from that of...buttermilk, toothpaste, Camembert cheese."--Tom Robbins

My friend Bethany and I share one thing in common: we loathe Sundays. Even if I am very good all day long--go to church, do my chores, wash behind my ears--I am still coated in a layer of anxiety come around five o'clock on Sunday evening. So, to combat the Sunday-funk, Bethany and I have instituted Sunday Night Suppers.

These suppers are the one night each week when I will try at least one new recipe, and Bethany (also known as The Official Taste Tester, or "Tott" for short) will half-heartedly chop things and keep me company while I cook. Drew usually has homework that he diligently does Sunday nights, so he just shows up to eat. And, if you aren't busy and you've got the Sunday-funk, you're welcome to swing by around six or so to show up and eat, too.


Tonight, Don and Tott showed up to witness an amazing sight: I decided to tackle cooking meat on my own. Drew is usually the meat-man, while I am the sauce-lady. But if we're going to have any meat other than boneless chicken breasts, bacon, or sausage on Sundays, then I have to get over my fear. The meat I chose for tonight's Sunday Night Supper? Venison tenderloin. Or, as we say in my house, deer meat.


Why deer meat? First, because my father is a prolific deer hunter, as you can see from the picture above of his garage. Now, some of you may have a problem with that, but if I couldn't convince him when I was an adorable child with tears in my eyes to please not shoot Bambi, I never will. The meat might as well not go to waste. And second, the meat is free, and we are broke.


I first soak my deer meat in milk to take the gaminess out. Then I followed a recipe from Romeo Salta's Pleasures of Italian Cooking. (I'll spare you another amateurish cookbook picture--clearly Drew is the photographer of the family). The recipe is actually for beef tenderloin, so if you don't have deer meat, you could just use beef instead.

(Don't you love this plate? Drew made it in Vacation Bible School in 1985. The others were, needless to say, dirty, or else this beauty would not be making its blog debut. )


Venison Tenderloin with Shallot Sauce
(as adapted from Romeo Salta's Pleasures of Italian Cooking)


2 venison tenderloins, soaked in milk for at least 2 hours and rinsed
1/2 cup olive oil
Juice of four lemons
1 teaspoon salt
4 tablespoons butter
3 shallots, thinly sliced
splash of white wine

Split each tenderloin lengthwise. Marinate in the oil, lemon juice, and salt for several hours, turning meat often.

Place opened meat on a rack in a broiling pan (I don't own a "broiling pan"--I just used a cookie sheet and a cooling rack placed on top of the cookie sheet). Broil 3 minutes on each side. (This turned out to be about medium rare). Let meat rest. Remove rack, and pour the drippings (carefully!) into a small pan. Add the butter, the shallots, a dash of white wine, and a squeeze of lemon juice. Place over high heat, bring to a boil and pour over the meat.

I served this meat with another Romeo Salta recipe, Risoverdi (in English, green risotto).


Green Risotto
1 cup chopped parsley
1 cup chopped green onions
2 cups chopped spinach
2 cups Parmesan
lots of butter
3 cans chicken stock (about 6 cups)
1 cup white wine
sprinkle of garlic salt
sprinkle of nutmeg
2 cups arborio rice

Melt around 3 tablespoons of butter in a big pan. Add the green ingredients and saute for around 4-5 minutes. Add the rice and saute until translucent. Put the chicken stock and the white wine in another sauce pan and get good and hot. Add around 2 cups of liquid to the rice at a time, and stir until the rice absorbs it. Keep adding liquid until the rice won't take any more, then cover and simmer. Keep the heat about medium-low the whole time. Taste as you go--this took around thirty minutes or so. Once the rice isn't chewy any more, add the cheese and stir. Add more butter if you want (I always do). Add the garlic salt and just a dash of nutmeg. Season with salt and pepper.

So, the verdict? I actually had to adjust Mr. Salta's recipes a lot to make them work, but everyone enjoyed the meal. I didn't marinate my deer meat long enough--Mr. Salta says 30 minutes, and that probably works for beef, but not for deer. So the meat was a little less tender than I like it (okay, so it was pretty chewy). But the flavor was great.

The risotto is really rich, and probably made around 10 servings--I'd cut the recipe in half next time, at least. But it's good...like a cross between creamed spinach and rice. I might throw a handful of mushrooms in there as well. I also served a salad with a homemade pomegranate vinaigrette (forgot to buy salad dressing at the store). I might post that recipe tomorrow, but for now, I'm ready to be done with this Sunday and go to bed.

Friday, January 2, 2009

tossed salad and scrambled eggs


Today I tried a new way of scrambling eggs. One of my New Year's food resolutions is to try a new recipe from each of my cookbooks. This one came from Helen Corbitt's cookbook, published in 1957. Drew's mom gave it to me for Christmas.


I have always heard that the way a person cooks eggs (well, really, an omelet, but close enough) shows how well she can cook. Well, I'm embarrassed to admit that my scrambled eggs are usually a failure--brown, ugly, and mostly stuck to the bottom of the pan. So, of course, now I want to master them.

I'm not sure if this is my favorite recipe--the eggs were delicious and at least they were bright yellow, but the texture...hmm. The eggs lacked the characteristic big fat curds that define scrambled eggs for me. Instead, they were just one light, fluffy, creamy mass. Maybe the texture was different because of the cottage cheese?


Now, the difference in texture might also be due to the double boiler* in which I cooked the eggs. I read in another cookbook, I can't remember which, that a double boiler is a good way to keep the heat nice and low so that the eggs don't dry out. Helen Corbitt just calls for a saute pan.


*This is my "double boiler."

I added truffle oil to the recipe because when I was a waitress at Dante's Kitchen in New Orleans, there was another waitress, Ginny, who would beg the line cooks to make her scrambled eggs with truffle oil before the brunch shift started. She was right; truffle oil (in very tiny quantities) is unbelievably good with eggs. So, while these may not be the perfect eggs, they are pretty darn tasty, and they made for a nice lunch.


Better-Than-Usual Scrambled Eggs
(as adapted from Helen Corbitt's Cook-book)

2 tablespoons butter (!)
4 eggs
3/4 cup cottage cheese, drained
salt and pepper
2 drops of truffle oil


Melt butter in your double boiler. Crack the eggs into the butter and add the cheese and salt. Stir until eggs look done. Add pepper and truffle oil and stir to combine. Serve atop buttered toast. I topped the eggs with a little arugula dressed with some balsamic vinegar and some fancy oil my sister Tallie gave me for Christmas.