FREE counter and Web statistics from sitetracker.com

Wednesday, December 1, 2010

so much stuffing...


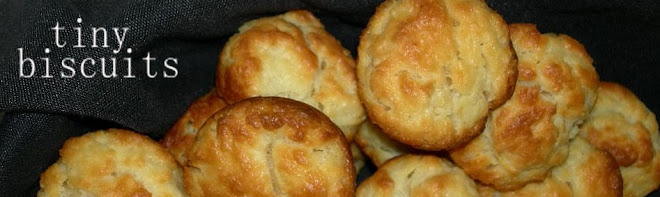
In the week after Thanksgiving, our fridge is normally full of leftovers. I assume that yours is, too. I've offered an option for your leftover turkey, and now I'm moving on to stuffing.

Or dressing, depending on where you're from. I've always called it stuffing, even though I've always been eating dressing. I don't think it really matters, as long as it is cornbread-based.

Regardless, you can use your old stuffing for turkey sushi. Don't freak out - the turkey's not raw. This is just a convenient way to get your holiday dinner in one bite, and it looks kind of like sushi. People love it.

We did this a couple years ago for one of our Christmas parties. For those of you not in the know, Kaytie and I throw a big Christmas party every year. It's a chance to see everyone we know, and it's also a chance to show off. There's usually a theme, like cajun or comfort food, etc. One year, we were inspired by our big 28-course anniversary dinner at Alinea, and we decided to do Christmas dinner, deconstructed and reimagined.

Some of the highlights were sweet potato & marshmallow nachos, mushrooms stuffed with green bean casserole, and, of course, turkey sushi.

Turkey Sushi

smoked turkey breast from the deli
(turkey should be sliced thick enough to stay together instead of all the slices falling apart)
canned cranberry sauce, cut into long strips
green onions
stuffing (see below)
mayonaise
seasoned cream cheese (see below)

Mix the stuffing and the mayonaise together. You only need enough mayo to moisten the stuffing and make it stick together. Probably about 1 to 1 1/2 cups of mayo for a whole pan of stuffing.

Lay one slice of turkey on a bamboo sushi-rolling mat. Spread a thin layer of seasoned cream cheese all over the turkey. Lay a green onion and a strip of cranberry sauce longways across one edge of the slice of turkey. Spoon some of the stuffing mixture over the cranberry sauce and green onion. Use the mat to roll the turkey around the stuffing, sauce, and onion, forming a roll about 1 1/2 inches in diameter. Slice into 1-inch slices with a very sharp knife.


Cornbread Stuffing/Dressing

1 pan of cornbread (we make ours from a mix)
4 cups of dried herb-flavored white bread stuffing
1 stick of butter, melted
1 can of chicken stock (about 2 cups)
2 onions, diced
3 stalks of celery, diced
1 tsp garlic salt
1 tsp onion powder
1 tsp poultry seasoning
2 tsp fresh sage, chopped

Preheat oven to 350.

Saute the onion and celery until wilted.

Crumble the cornbread, and add it to the white bread stuffing. Add the veggies, and stir everything together. Pour the butter and chicken stock over everything, and add the spices. Mix everything together.

Spread the mixture evenly in a casserole dish, and bake for 30-45 minutes, until browned.


Seasoned Cream Cheese

1 pkg cream cheese, room temp
1 Tbs poultry seasoning
1 tsp garlic salt
1 Tbs fresh sage, chopped

Mix it all together.

Saturday, November 27, 2010

too much turkey?


So, Thanksgiving has come and gone (time for Christmas! Whoo hoo!), and you have a bunch of leftover turkey, right? (Unless you ate at my Thanksgiving dinner - the head honcho prefers roast chicken and ham. But I'm cooking a turkey next year. Fried or smoked, it matters not to me. With God as my witness, there will be turkey at my next Thanksgiving dinner!)
So, a fridge full of turkey - now what? Well, there's always the obligatory turkey & cranberry sauce sandwich, but how many sandwiches can you eat?
I have your solution: turkey bone gumbo. It's a recipe handed down to me from my mom and modified a little ('cuz that's how we roll) by Kaytie. It's friggin' delicious.
By the way, you may be wondering how we made this, since there was no turkey at our Thanksgiving dinner. Well, we like this recipe so much that we begged for bones from another house!
(Historical note: The first time we made this was the first time we ever made stock. Now, we make stock all the time! Like pioneers.)
Turkey Bone Gumbo
(makes a lot)
for turkey stock:
turkey bones
2-3 carrots
2-3 stalks celery
2 onions
1 rutabega
2-3 bay leaves
1 tsp black peppercorns
a few sprigs of fresh thyme
for the gumbo:
1/2 stick butter
1/4 c olive oil
3/4 c flour
2 onions, diced
1 bell pepper, chopped
3 cloves garlic, minced
2 stalks celery, chopped
2 bay leaves
1 tsp dried oregano
1 Tbs dried basil
1-2 Tbs fresh parsley, chopped
1 Tbs powdered sage
hot sauce, salt, & pepper to taste
1 pint heavy cream
2 c chopped turkey
1 lb smoked sausage, cut into bite-size pieces
1 bunch of green onions, diced
Put the turkey bones in a big stock pot. (We had a discussion about this at Thanksgiving dinner this year. What's the most appetizing word for turkey bones? Carcass? Body? Cadaver?)
Chop the carrots, celery, onion, and rutabega into large chunks, and dump them in the pot. Add the bay leaves, peppercorns, and thyme. (Please note: all of this stuff is optional, but it will make the stock delicious!)
Cover everything in the pot with water. Boil (covered) for about 1 1/2 hours. The meat should pretty much fall off the bone.
Strain everything out, and reserve the meat and the broth.
Saute the sausage in a frying pan. Get a good browning on most sides. Reserve the sausage.
Now, make a roux in the sausage drippings. First, melt the butter over low heat. Add the olive oil and flour. Cook over low heat, stirring constantly, until the flour turns light brown and no longer smells raw.
Add the onions, garlic, celery, and bell pepper. Cook until the veggies are wilted.
Add 2 quarts (8 cups) of the reserved turkey broth. (Freeze the rest in 2-3 cup containers for later use when making more turkey bone gumbo, cooking rice, making soup, etc...)
Add the bay leaves, oregano, basil, parsley, sage, hot sauce, salt, and pepper. Bring the whole thing to a boil. Reduce heat, and simmer, uncovered, for an hour.
Add the cream. Bring to a boil, and boil until the liquid level reduces by about an inch.
Add the sausage and chopped turkey. Lower the heat to med-low, and cook for 15 minutes.
Add the green onions, and cook for a few more minutes.
Serve over rice.

Monday, October 25, 2010

study break


So, I eat a lot of snacks these days. For some reason, I want to eat when I am studying, and since I study 12-13 hours a day these days, I want to eat all the time.
I like salty snacks. I really like candy, and I eat a lot of it. But I know these things are not good for me, and I've actually discovered that eating fruits and vegetables makes me feel better, so I try to work in some healthy snacks, too. Like apples & peanut butter, string cheese, nuts. (I'm currently a big fan of plain almonds. They're my new favorite super food. Other super foods: spinach, salmon, eggs, annnd... bacon.) I eat a lot of carrots, too. They're nice and crunchy - a good quality in a snack food. Plus, I can dip them in stuff. Like hummus.
Hummus
(makes about 5 cups)
1/2 lb chickpeas
3/4 cup tahini
1-2 Tbs garlic powder
1-2 tsp paprika
1/4 - 1/2 tsp cayenne powder
1 tsp salt
juice 1 1/2 lemons
1 1/4 cups water
First, the chickpeas. They come, dried, in 1-pound bags. Prepare them according to the package directions (salt the water). This will make too many, but you can freeze half of them until you make the next batch of hummus. You'll need about 3 cups of cooked chickpeas. (This probably translates to about 2 drained cans of chickpeas, if you want to take a shortcut. I don't judge.)
Now, let's talk tahini. You can buy it at the grocery store in the international aisle. (I've bought it at Kroger.) But I think you can probably get a better deal at a Mediterranean grocery store. I know for sure that you can get your weight in bay leaves for about 3 bucks. It's worth checking.
Okay, now for the recipe. It's pretty simple. Dump everything in a food processor, and puree the hell out of it. I've made the spice measurements variable for a reason. Start low, and add more until you like the taste. Also, if the hummus is too thick, you can add more water, a little at a time, to thin it out.
Puree, puree, puree. Store it in the fridge, and eat it on carrots while you learn about inherited disorders of metabolism or the lumbar plexus. Or on pita chips or Wheat Thins - hummus is good on those, too.

Saturday, October 16, 2010

one last bite of summer


We hadn’t seen Sarah and Tim in a while. Sarah’s a doctor – I’ve followed her around the ER a little bit – and Tim is a lawyer, so it’s a pretty good match for us. (Because Kaytie’s a lawyer, and I’m in med school.) As a side note, they also have one of the best babies I’ve ever met. She's not quite as cute as Aubrey, but it's a pretty close competition.

Anyway, our schedules finally aligned a couple weeks ago, so we planned to have a glass of wine at their house. Well, we don’t like to go anywhere without food, and I hadn’t cooked anything in a while, so I thought I’d make a dip. Something on the lighter side, fresh-tasting. Something that just catches the tail end of the summer produce.

And now, here is the most thorough recipe for dip that you will EVER read.

Roasted Red Pepper Dip
(makes about 3 cups)

2-3 red bell peppers
2 ears of corn, husks on
2 shallots, diced small
2 Tbsp fresh basil, chopped fine
3-4 slices bacon
½ cup manchego cheese, grated superfine
1 ½ cups mayonnaise
¼ cup sour cream
salt & pepper

Roast your peppers. Preheat your oven to 425. Remove seeds and ribs and cut peppers into large slices. (the larger, the better) Line a baking sheet with heavy-duty foil, and spray it with Pam. Lay your peppers out, skin side up, and slide them in the oven. Bake for about 20 minutes, and then broil ‘em until the skin blisters and blackens all over. Let them cool.

Cook your bacon. Crispy is good, but burned is bad. I usually cut my slices in half, cook them over medium heat, and flip them often. Once the bacon is cooked, lay it out on paper towels. As soon as it is cool enough to touch, crumble it into a food processor, but reserve a little bit (about ½ tsp) of crumbs for garnish. Pulverize the rest of it in the food processor into very, very small crumbs.

If you still have bacon grease in the frying pan, use it to sauté your shallots over medium heat until they’re just translucent. If you tossed the grease already, just use a little olive oil. Set the shallots aside.

I like grilled corn. A lot. So, instead of just draining a can of corn and using that (which you can do if you want), I decided to grill the corn and slice it off the cob. Basically, pull as much of the silk off as you can, rewrap the corn with the husks, and soak them for 10-15 minutes so the water soaks up into the husks. Grill for about 5-10 minutes on each side. Wear some leather gloves and work quickly as you shuck the husks off the corn and throw them back on the grill. Keep an eye on them and rotate to brown the corn a little bit. When it cools down a little, slice it off the cob. Reserve a little for garnish.

Okay, time to do some stirring. Combine the mayo, sour cream, basil, bacon, shallots, and corn in a mixing bowl. Stir it up and add the cheese. By the way, pretty much any hard cheese would be good – I used manchego (I think – it might have been gruyere - I can't remember) because we had it in the fridge. Also, I used a microplane to grate it so fine it was fluffy.

Back to the peppers. Once they’re cool enough to handle, you need to get the peels off. This is a messy and slightly annoying task, but it’s worth it. Home-roasted peppers are SO much better than the ones you buy in a jar.

Puree the peeled peppers in the food processor. Add the resulting mush to the dip that you’ve already mixed. Stir well. Season with salt & pepper to taste.

Put it in a serving bowl, and garnish with the corn kernels and bacon crumbles. You could add some julienned basil, too. You can serve this right away, but I think it benefits from a couple hours in the fridge, covered with plastic wrap. That gives it time for the flavors to marry.

We served this with plain pita chips. It would be great with Fritos, too.

Sunday, September 26, 2010

one-upper


Obviously, I haven't been posting much lately. Why, you're wondering? Well, I started med school in August. And let me tell you this - there's a lot to learn. Luckily, I like what I'm learning.

Every once in a while, though, I need to cook. It's a great study break.

So, recently, I made some "World Peace" cookies from a recipe I found in a recent Bon Appetit. Sounds great, right? Well, they were good. A little on the dry side, though. My buddy Kris said cookies don't have to be soft. He and his wife enjoyed them.

I disagree. Cookies should be soft. And what does Bon Appetit know? I can make a better cookie. So, I messed with the recipe, and let me tell you, they're SO much better.

There are times to be humble, I know. This is not one of them. These cookies are absolutely delicious. I can say without exaggeration that they are the best chocolate cookies you'll ever eat. Okay, that may be a bit of a boast, but these cookies are great. They're soft and rich and light at the same time.

Kaytie took one bite, looked at me, and said, "I hope you wrote this down."

I did. And instead of learning about the innervation of the heart, I'm sharing it with you. It's THAT important.

Best Chocolate Cookies EVER

1 1/2 sticks butter, room temp

1 Tbs vanilla

1 Tbs milk

2 Tbs strong coffee, room temp

1/4 cup granulated sugar

2/3 cup packed brown sugar

1 egg

1/4 tsp kosher salt

1 1/2 cups all-purpose flour

1/3 cup unsweetened cocoa powder

1/2 tsp baking soda

5 oz bittersweet chocolate

Mix the butter, vanilla, coffee, milk, both sugars, and salt until creamy. Add the egg and mix well.

In a separate bowl, sift the flour, cocoa, and baking soda together.

Combine the wet and dry ingredients, and mix until smooth.

Chop the chocolate into small chunks (nothing bigger than about 1/3 of an inch). Fold the chocolate into the dough.

Refrigerate the dough for a couple hours until it is firm. (NOTE: This step is unnecessary. If you want your cookies faster, you can cook 'em right off the bat - just knock a minute or two off the baking time. The benefit to cooling the dough is that you have a lot more control over the shape and size of the cookies.)

Preheat the oven to 325.

Line 2 cookie sheets with parchment paper.

Roll the dough into balls that are about 1 - 1.25 inches in diameter. I recommend wearing latex gloves while you do this. Place the balls on the cookie sheet about 2 inches apart. (If you decided not to chill your dough, just scoop it onto the cookie sheets.)

Bake for 11 minutes.

You probably can't bake all of the dough at the same time. You should keep the extra dough in the fridge while you're baking the first round.

Cool the cookies on a rack.

Makes about 4 1/2 dozen delicious cookies.

Friday, August 13, 2010

parting gift


August is a big month for us. Kaytie starts a new job – she just finished her clerkship today. I quit the restaurant business, and on Monday, I start med school. I, of course, am excited about this, but leaving my work was bittersweet. I will miss my friends there, and I’ll probably be too busy to stop for a drink.

As a parting gift, Melissa made me one of her famous angel food cakes. This, to me, is in the same class of culinary magic as homemade marshmallows. I think of angel food cake as something that is bought at the store, not made at home. Melissa has proved otherwise, and I can’t wait to make this cake myself.

Angel Food Cake

1 ¼ cups sifted flour
1 ½ cup sugar, separated in half
12 egg whites
1 ½ tsp cream of tartar
½ tsp salt
1 ½ tsp vanilla
½ tsp almond extract

Plan ahead. Set your dozen eggs on the counter and let them sit out overnight. Don’t worry – you’ll be fine.

Preheat the oven to 350.

Sift ¾ cup of sugar and the flour together. Set aside.

Combine the egg whites, cream of tartar, salt, vanilla, and almond extract. Beat with a wire whip until soft peaks form.

Gradually add ¾ cup more sugar, about 2 Tbsp at a time. Beat until the meringue holds stiff peaks.

Gradually fold in the flour/sugar mixture until it is just incorporated.

Pour the batter into an ungreased 10-inch tube pan that is 4 inches deep. Gently run a knife through the batter a couple times.

Bake 35 to 45 minutes, until a cake tester comes out clean.

Invert the pan on a cooling rack until the cake is completely cool.

Saturday, May 29, 2010

the end of an evening

To finish off Tott’s end-of-the-first-year-of-law-school dinner, we served a lemon crème brulee that the folks at Briarwood paired with an Elderton Semillon.

We chose crème brulee for a couple of reasons. We’d had several successes in the past. The custard could be made beforehand. And, of course, everyone loves crème brulee and thinks it is fancy.

Lemon Crème Brulee
(makes 8 servings)

2 lemons
3 cups heavy cream
7 Tbs white granulated sugar
6 large egg yolks
½ tsp vanilla
about 8 tsp turbinado sugar
8 crème brulee ramekins
1 blowtorch

Preheat the oven to 325. Make sure the oven rack is in the middle position.

Zest the two lemons and combine the zest with the cream in a heavy saucepan. Stir in the white sugar and a pinch of salt. (Save the zested lemons for juice later.)

Heat the mixture, stirring occasionally, over medium-low heat until it is almost boiling. Remove it from heat. Allow it to cool to room temperature, and then cool in the fridge for 2 or 3 hours. (You don’t have to do this step of cooling it in the fridge, but if you do, the lemon flavor will be stronger.)

Remove the cream mixture from the fridge and place it over medium-low heat. Once again, stir occasionally as it warms, and remove it from the heat just before it boils.

Lightly beat the yolks in a heatproof bowl. Gradually whisk in the cream. Just slowly drizzle it into the yolks while you are whisking quickly. This should prevent the eggs from curdling.

Pour the custard mixture through a wire colander to strain out the zest and any cooked yolk. Stir in the vanilla and 1 tsp fresh lemon juice.

Divide the custard evenly among the 8 ramekins.

Arrange the ramekins in a roasting pan. Place the pan on the oven rack, and pour in water until the water level is about halfway up the sides of the ramekins.

Bake 30 to 40 minutes. The custard will be set around the edges, but the centers should wobble when the ramekins are wiggled.

Carefully remove the roasting pan from the oven. (I bumped the edge of the stove and ruined two custards when the water bath spilled into them. I was able to save two others by carefully soaking up the spilled water off the tops of the custards with paper towels.)

Cool the custards in the water bath for 20 minutes, then chill uncovered in the fridge for 4 hours.

Just before serving, evenly sprinkle the turbinado sugar over the tops of the custards. Use your blowtorch to melt and caramelize the sugar. Keep the torch moving to avoid burning the sugar.

Wednesday, May 26, 2010

greater tuna

It’s about time we got some seared tuna on this blog. (Actually, my mom put a recipe on here, but I didn’t get to taste it.) This was the main course of Tott’s celebration dinner: seared tuna with a beurre blanc over rice, sautéed snow peas, and ginger pureed carrots.

Step 1: Get some good tuna. Sushi-grade – because the middle of this is going to just on the rare side of raw. But if you have good tuna, that will be delicious. (By the way, my favorite way to get good fish is to make friends with a restaurant kitchen manager. Retail is for suckers.)

Orange-Ginger Seared Tuna
(4 light servings)

1 lb sushi-grade tuna (2 steaks)
2 oranges
2 Tbs soy sauce
5 quarter-sized slices of fresh ginger
¼ tsp Sriracha hot chili sauce
1 dash sesame oil
Black pepper

Make your marinade. Zest about half an orange into a bowl. Squeeze the juice from both oranges into said bowl. Add everything else (except the tuna), and stir it all together.

Put your tuna in a Ziploc bag. Dump in the marinade. Squish around to ensure even coverage. Marinate the tuna in the fridge for 45 minutes to an hour.

I seared the tuna in a cast iron skillet. The trick is to make it very hot. Heat the pan on high until it begins to smoke a little. Add just a bit of oil to just barely coat the pan.

Remove the tuna from the marinade, making sure the ginger slices don’t stick to the fish. Lay the tuna on one side and cook for 1-2 minutes. Flip the tuna, and cook for another 2 minutes.

Slice thinly and fan over a bed of rice. We topped this off with a beurre blanc (which made it richer and fancier), but Kaytie made the sauce, so you’ll have to wait for her to post that recipe.

Sunday, May 23, 2010

the perfect food

Mark Bittman calls the scallop one of nature’s most perfect foods. (I know this because we’ve been cooking a lot out of his Minimalist Cooks at Home cookbook. Great recipes.) I agree with him. Who doesn’t love scallops?

That’s why we chose a seared scallop as an amuse bouche for Tott’s fancy dinner.

Kaytie really should be writing this post, since she made the stuffing, sautéed the spinach, and whipped up the delicious sauce. (All I did was stuff and sear the scallops.) But she’s taking a nap right now. You snooze, you lose, baby. Plus, I really like how the scallop in the picture looks like a monster. A delicious little monster.

(I do hope she’ll post the recipe for her beurre blanc, though. It was incredible.)

Seared Stuffed Scallops over Sauteed Spinach
(an exercise in alliteration)

Scallops: Since we served this as a quick appetizer, we only served one scallop per person. (A total of five.) If you want to serve this as an entrée, then you will, of course, need more scallops. Mark Bittman recommends 1 ½ pounds for 4 servings. You’ll probably need to double the stuffing recipe.

Stuffing
1 handful fresh basil leaves
1 very small garlic clove
½ tsp salt
¼ tsp pepper
juice of ¼ lemon
1 Tbs olive oil

Mince the basil, garlic, salt, and pepper together until everything is very finely chopped – almost a puree. Mix in the olive oil and lemon juice to make a paste.

To stuff the scallops, cut horizontally almost all the way through the scallops. They’ll open up like a clamshell. Spread a little dollop of the stuffing inside each scallop, and close them.

Place a large skillet over high heat for a little while. I used our trusty cast iron skillet and waited until it was smokin’ hot.

Add a couple tablespoons of olive oil to the pan.

Add the scallops one at a time. Let them brown for 1 or 2 minutes. Carefully flip them over to brown the other side for another 1 or 2 minutes. These need to be served quickly, so they’re nice and hot.

While I was searing the scallops, Kaytie was sautéing spinach and making the sauce. We put a little spinach on each plate, put a scallop on that, and topped the whole thing off with beurre blanc and some capers.

Saturday, May 22, 2010

porch drinks

We had wine for most of the courses of Tott’s dinner. We wanted to mix it up a little, though, so while we seared the tuna and sautéed the snow peas and while our guests snacked on gravlax & cucumber bites, we had a sake cocktail.

Tott kept calling them sake-tinis, but I’m not a fan of that. They’re based on a recipe we found for a drink called Green My Eyes, which is an incredibly stupid name. Whatever you call it, this is a great summer cocktail. It would be perfect for sitting on the porch or by the pool, and we will certainly be taking a bottle of sake to Dallas for the 4th of July family reunion.

We used “seedless” cucumbers, which were smaller than regular cucumbers and turned out to have seeds. Liars. I think it would be fine to use regular cucumbers.

Cucumber Fizz

3 slices cucumber
1 oz chilled sake
½ oz simple syrup
club soda

Muddle the cucumbers in the bottom of a rocks glass (or a highball glass). Fill with ice. Add the sake and simple syrup and top it all off with the club soda. Stir lightly to mix, or pour it into a shaker and back into the glass. You can garnish it with another slice of cucumber, if you’re into that sort of thing.

**These are delicious as they are, but I think I’m going to muddle a couple of mint leaves with the cucumbers next time, just to see how it goes. Not too much mint, though, because you don’t want to overwhelm the cucumber flavor.

Thursday, May 20, 2010

A cure for salmon


When I waited tables at the Parker House, the ladies loved to order salmon. Pronounced SAL-mon. Well done, please. And could you bring a glass of white zinfandel? Blech. Maybe that experience is why I hate most cooked salmon; it just tastes fishy and gross to me. But I do love smoked salmon. I actually trained myself to like it when I was in my early twenties; I'd just started dating Drew, and his family liked to have smoked salmon, capers, and cream cheese with bagels at brunch. I thought this was the height of elegance, and so I was convinced that truly cultured people liked smoked salmon. I choked down a ton of it, trying to acquire a taste for it. And you know what? I did!


Well, so since I love smoked salmon (and I know Tott does, too), I wanted to make it for her party last Saturday. Unfortunately, I don't know how to work a smoker. I'm sure Drew could make it if he tried (there's not much I think Drew can't do, other than carry a tune), but he had to work most of last week when we were getting ready for Tott's party. So smoked salmon was out, and I didn't know what to do for the third course. Then I came across a Mark Bittman recipe for gravlax--cured salmon, in other words. Well, I figured I could do that. And you know what? I could!


Cured salmon is super easy--you only need a little bit of really fresh, high-quality salmon and time. We served it sliced thin and piled on top of cucumber rounds with a little dollop of some dill-infused sour cream. Sooooo good.


Citrus-Cured Salmon
(modified from The Minimalist Cookbook by Bittman)


1 lb. fresh raw salmon
1/2 cup salt
1 cup sugar
2 tablespoons sriacha
zest of one lime, one lemon, one orange, and one grapefruit
1 tablespoon ground coriander


Combine all ingredients but salmon. Lay salmon on a clean sheet of cling wrap. Cover in salt mixtures, piling it all on there. If your salmon fillet has skin on it, pile it all on the opposite side. Wrap tightly in cling wrap (I think I put mine in a baggie). Let it rest 36 hours in the refridgerator. Rinse mixture off and dry. Slice thinly on the bias.


Sunday, May 16, 2010

aubrey approved

Last night, we had a dinner party for Tott. You see, she just finished her first year of law school. So, we came up with a killer menu – seared stuffed scallops, crab salad over avocado, cured salmon & cucumber, seared tuna, and lemon crème brulee. The nice folks at Briarwood took a look and picked out wine for each course. (The pairings were great, by the way.) We like to cook over the top, and we had an excuse.

We didn’t want people to have to stand around in the kitchen, watching us prepare each course, so we spent Saturday prepping. And what’s better than prepping all day? Prepping while babysitting!

Kaytie’s goddaughter came over at 6 AM. Luckily, even a baby knows that’s way too early to be awake, so she slept until 9:30. (So did we.) Then, Kaytie and I cooked while Aubrey made a mess and a LOT of noise. (We didn’t mind, of course, but the dogs preferred to spend the day outside.)

We had decided to serve the tuna with sautéed snow peas and pureed carrots. As I was turning the carrots into mush, I realized that I had a rare opportunity. I was making something that looked like baby food, AND I had a real live baby in the house. With just a couple pictures, I could make this food blog a whole lot cuter.


Anyway, these are the best carrots you’ll ever eat. Even Alice, who was scarred by a childhood memory of Mickey Mouse and some carrot cake, ate all of her carrots. They’re that good.

Ginger Pureed Carrots
(serves 4-5)

1 lb baby carrots, cut in half
1 Tbs brown sugar
1 Tbs minced fresh ginger
½ cup chicken stock
½ tsp salt
5 Tbs butter
¼ cup heavy c ream

Over high heat and in a covered pot, simmer the carrots, sugar, ginger, salt, and chicken broth for about 12 minutes, until the carrots are fork-tender.

Puree the mixture with the butter and cream in a food processor until it is the consistency of baby food. You may want to season with a little more salt.

You can make this ahead of time and keep it in the fridge. Reheat in the microwave for 4 minutes or so, stirring once half way through. Make sure it's not too hot if you're going to feed it to a baby.

Thursday, May 13, 2010

quick & easy

We had Kaytie’s parents (Kathy & Eddie) over Sunday night to celebrate Mother’s Day. Since I had been working the busiest lunch all year from 9 to 4, we needed an easy meal. Easy and delicious.

Our go-to meal? Boiled shrimp. It’s one of Eddie’s specialties – he also fries a mean piece of deer meat, but only when Kathy’s out of town. Anyway, Kaytie has learned the recipe well, and now you can, too.

For sides, we had boiled potatoes, blanched asparagus, and grilled corn.

Eddie’s Boiled Shrimp

raw, unpeeled, headless shrimp (roughly 1 lb per person)
water
crab boil (found by the spices at the store)
1-2 lemons, cut in half
1 onion, quartered
salt

Fill a large pot ¾ full of water. Add crab boil to taste – Kaytie usually uses two capfuls.

If you have bought frozen shrimp, which we usually do, thaw it out. We put the shrimp in a colander and run cold water over it, and this thaws it pretty quickly.

Bring the water to a rolling boil. Add the shrimp, lemons, and onion – this will stop the boiling.

Let the water return to a boil. When it does, boil for 1 minute.

Turn off the heat and add a generous amount of salt. (This makes the shrimp easier to peel.)

Let the pot stand covered for 5 minutes.

Drain the water off, and dump the shrimp over ice, which will stop them from overcooking themselves.

Serve with…

Drew’s Delicious Cocktail Sauce

1 ½ cups ketchup
1-2 Tbs horseradish to taste
juice of 1 lime
1-2 Tbs Sriracha hot chili sauce
1 heaping Tbs honey

Mix together, chill, and serve.

one from the vault: best corn ever

We’ve made this several times. It’s been served alongside grilled dove, boiled shrimp, and roasted pork shoulder. It’s also been a hit every time.

Grilled Corn on the Cob

fresh corn, in the husk

Soak your corn for about 10 minutes. Remove the silk. I carefully peel back the husks about half way to make sure I get as much of the silk off as possible. “Re-husk” the ears of corn so they are covered again. Soak the corn for another 5 minutes. This soaking will get some water into the husks, which will kind of steam the corn on the grill. It’ll also help keep the husks from burning.

I use a gas grill on medium-high heat. Put the corn on, close the grill cover, and grill for about 5 minutes. Rotate the ears, close the cover, and cook for another 5 minutes.

Here’s the brilliant part. (Also, a little dangerous.) You’re going to quickly peel off the husks and return the corn to the grill. I say quickly because they’re hot. I recommend wearing a pair of leather gloves. (You might want a pair of latex gloves underneath, too.) You still need to work quickly, though, because there is steam and hot water inside the husks, and your gloves are gradually going to get wetter and hotter.

All this risk of steamed palms is worth it, though. When you return the husked corn to the grill, you’re going to caramelize the kernels. Keep watch and turn them frequently until the kernels are golden brown.

Grilled corn is delicious on its own, but it’s even better with…

Blue Cheese Compound Butter

3 sticks butter, room temp
2 Tbs Dijon mustard
1 Tbs fresh thyme, finely minced
pinch of salt
½ lb crumbled blue cheese

Gently mix everything together in a bowl. Add more salt if needed. This is best served at room temperature.

Friday, April 30, 2010

two bad dogs

I’m normally very proud of my dogs. They’re great with our goddaughter. They follow the rules. (No barking inside when we’re home. No dogs in the bedroom.) They haven’t had an accident inside in about seven years. I’m pretty sure they speak English, and I swear they can tell time – they wake me up every morning precisely at six. They do have some endearing peculiarities: they love ice, they really enjoy eating plants, they’re scared of thunder and hide in the closet when it rains, and they’re terrified of cameras. (I had to catch Belle by surprise as she came out of the bushes to get the above picture, and I had to use my lousy camera phone. There was no chance of getting them both in the same picture.)

Every once in a while, however, they make me mad. A couple months ago, I was going to pick Kaytie up from work for lunch. I made two sandwiches, left them on the counter, and left. (Most of the time, I can leave food on the coffee table, leave the room, and come back to find the food untouched.) When we got home, the sandwiches were gone, and Belle and Bailey had guilty looks on their faces.

With this in mind, I thought I’d taken enough precautions to protect my bread. The two loaves were cooling on a rack that I slid to the very back of the counter. I moved the knife block to create a physical barrier in front of the rack. I thought it was safe. We were on our way to a wine tasting, and we were throwing a small after party. The bread was for bruschetta with olives, roasted red peppers, and manchego.

I think you know where this is going. When we got back to the house, an entire loaf of bread had disappeared. At least they left us one loaf for the bruschetta, though I think that was due less to their altruism than to the second loaf being out of reach.

Anyway, you should have the recipe for this bread, even if you don’t have a picture of it. The bread is great – one of Mom’s staples when I was growing up. So easy to make that two of my brothers sold loaves door-to-door for pocket money, and so tasty that it’s always a crowd pleaser.

Easy Italian Bread
(makes two loaves)

4 ½ cups all-purpose flour, plus some extra for dusting
1 Tbs salt
1 Tbs sugar
1 Tbs butter
2 packages active dry yeast
1 ¾ cups warm water (110˚)
cornmeal
vegetable oil
1 egg white (optional)
1 Tbs cold water (optional)

The original recipe calls for making this in a food processor, which is easy. My food processor is not very big, so I used my stand-up mixer. Either way, you want to combine 3 cups flour, salt, sugar, and butter in the food processor or bowl. Pulse the food processor a few times to cut in the butter. If you’re using the mixer, cut in the butter with 2 knives in a criss-crossing motion and mix the ingredients with the paddle attachment briefly.

Stir the yeast into the water in a measuring cup. Add half the water to the dry ingredients. Pulse the food processor 4 times. (Or run the mixer using the dough hook for a few seconds.)

Add 1 ½ cups flour and the rest of the water/yeast mixture. Pulse the food processor 4 more times. (Or use the dough hook to mix.)

Run the food processor or the mixer until a ball of dough forms. Once the ball forms, keep running to knead for a minute or so.

Turn the dough onto a lightly floured board. Knead a few times to form a smooth ball.

Cover the ball loosely with plastic wrap and a dishtowel. Let the dough rest for 20 minutes.

Divide the dough in half. Roll each half into a rough rectangle that’s about 15 x 10 inches. Start at the wide side and roll the dough tightly to form a long baguette-looking loaf. Pinch the seams together and seal by gently rolling back and forth.

Grease one or two cookie sheets and dust with cornmeal.

Put the dough on the cookie sheets. Brush the dough with oil. Cover loosely with plastic wrap and refrigerate for 2 to 24 hours.

When you’re ready to bake the bread, take it out of the fridge. Let it rest at room temperature, uncovered, for about 10 minutes while the oven is preheating to 425˚. Make 4 or 5 diagonal slits in the top of each loaf with a sharp knife. I keep a scalpel in the kitchen for just this purpose.

Bake for 15-20 minutes. (My oven’s perfect time is 16 minutes.) The bread should be light brown. (To check for doneness, thump the loaf on the bottom. If it sounds hollow, the bread is done.)

If you want a shiny loaf, do the following. Mix the egg white and cold water together. Take the bread out of the oven at about 14 minutes. Brush with the egg white mixture and return the bread to the oven. Bake for about 5 minutes more, until the bread is golden brown and shiny.

Cool the bread on a wire rack, out of the reach of your bad dogs.

Friday, April 23, 2010

eureka!

“Mmm, baby, this is the recipe!”

When Kaytie said that, I knew I’d finally made a great batch of biscuits. Off and on, I’ve been working on a recipe and learning the process of biscuit-making over the past year. I grew up with biscuits of the drop or canned variety, but now that I live in Mississippi, I wanted to learn to make the classic Southern biscuits that we have here.

Lots of people claim to have a great biscuit-maker in their family, and in the next breath, they tell me there’s no recipe. You have to watch someone to learn to make biscuits. But nobody ever invited me to watch.

So, I played. I looked online. I picked up some tips along the way. The fat needs to be cold. Kneading too much creates a tough biscuit. Don’t twist the biscuit cutter when you cut the biscuits out. White Lily is the best self-rising flour, and the recipe on the bag is the best. (Not all of the tips panned out. My attempt at the White Lily recipe was a flop. White Lily’s supposed to be good because of the low protein content, so I decided to use cake flour in my recipe. So, some good came out of that batch of tiny hockey pucks.)

These biscuits are soft and light and taste like butter. Good luck!

Classic Southern Biscuits
(makes 10-12 2-inch biscuits)

2 ¼ cups cake flour, plus some extra
2 Tbs double-acting baking powder
1 ¼ tsp salt
½ cup unsalted butter, cold
½ cup butter flavor shortening, cold
1 ¼ cups buttermilk

Put the flour, baking powder, and salt in a bowl and whisk until well-mixed.

Slice the butter and shortening into quarter-inch slices. Toss the slices in the flour mixture to coat them. Use a pastry blender (or two knives) to cut in the butter and shortening. If you’re using knives, move them towards each other through the flour so that they criss-cross in the middle of the bowl like scissors. The point here is to cut the chunks of fat into smaller pieces. You should cut in the butter and shortening until you have pea-sized pieces throughout.

Put the bowl in the fridge for about 10 minutes. You want the butter and shortening to stay cold. I forget why, but it’s important. While you’re waiting, preheat the oven to 450.

Mix in the buttermilk until everything is just combined.

Get yourself a little bowl of flour. Dump the dough onto a floured surface. Liberally dust the top of the dough with flour. Knead it a couple times, adding more flour as necessary. You want the dough to be sticky, but not too sticky.

Pat the dough into a rectangle that is about 3/4 inch thick. Dust the top lightly with flour and fold the rectangle in half. Pick up the dough and smack it back down. I’m not sure why you have to be so rough with it, but Kaytie’s dad thinks the smacking is important, and I did it, and the biscuits turned out well.

Pat the dough back into a rectangle. Repeat this dusting, folding, and smacking process two or three more times.

Pat the dough down to about ¾-inch thickness. Cut biscuits with a two-inch biscuit cutter. (I use a drinking glass.) Do not twist the cutter. Press straight down and pick straight up. Go ahead and cut all the biscuits that can fit before you pick any of them up.

Peel away the extra dough, pick up the biscuits, and place them on a cookie sheet that you have lined with parchment paper. The biscuits should be just touching, side by side.

Mush the extra dough back together. Flatten it out, fold it over, and smack it down. Flatten back out to 3/4 inch thickness. Cut more biscuits, and repeat this process until all the dough is gone.

Bake for 13-15 minutes or until lightly browned.

Monday, April 19, 2010

one from the vault: olé!

This recipe comes from waaay back. Back in Marks, MS, in a tiny little house that had been a garage at one point. Window unit A/C, space heaters, bugs galore, and a flooded living room whenever it rained too hard – this was our first year living together. But we had a decent kitchen, and with only one restaurant (two, if you count McDonald’s) open for dinner, we set about learning to cook.

One thing we cooked often was deer meat. (I grew up in Dallas, and we called it venison. Mississippi’s more straightforward.) We had a never-ending supply, thanks to Kaytie’s dad and a deep freezer. We’d grill or roast the tenderloins and grind the rest. I had an old-fashioned hand-crank meat grinder, and I’d mix about half deer meat and half beef, to get some fat in there.

Of course, then we had pounds of ground deer meat. Tacos and chili, sure, but after a while, we had to get a little creative. One of the best dishes was Mexican Casserole. (Probably not the most PC name – I’ll take suggestions for a new one...) It tastes great when you make it, and the leftovers are good, too. You can just reheat it, or you can scramble it in with eggs for breakfast. (Red beans & rice leftovers make a great omelette, too !)

Mexican Casserole
(makes 5-6 servings)

1 cup rice
1 ½ cups chicken stock (or water)
1 can Rotel tomatoes & chilies
½ onion, diced
1 jalapeno, seeded & minced
1 lb ground meat
1 tsp oregano
2 tsp cumin
1 tsp garlic salt
½ tsp paprika
1/8 tsp cayenne
½ tsp chipotle powder (optional)
2-3 oz cream cheese
8 oz Velveeta (optional)
plenty of grated cheese

First, make the rice. Put the rice, chicken stock, and Rotel in a saucepan. Bring to a boil, cover, reduce heat to med-low, and simmer 25-30 minutes, until all the water is soaked up.

Over medium heat, saute the onion in a little olive oil until it’s translucent. Add the jalapeno, and cook about 2 minutes more.

Add the meat and the spices. Cook, stirring, until the meat is browned.

Mix the beef, rice, cream cheese, and Velveeta together and put all of it in a casserole dish. Top with grated cheese – the more, the better.

Bake at 350 for about 10-15 minutes, until the cheese is all melted.

**You can make this casserole and freeze it. Just follow the recipe, but leave off the grated cheese, and put the casserole in the freezer instead of the oven. Let it thaw before you cook it, and cook for 20-25 minutes instead.

Monday, March 22, 2010

best broccoli

Used to be, Kaytie would have thought that good broccoli was impossible. Just the smell of cooking broccoli was enough to make her gag repeatedly. She hated the soggy, limp texture that steaming produced.

The solution? Roast the florets! The caramelization is great. Then, finish them off with some lemon – I’ve decided lemon is the best complement to most dark green veggies – sautéed spinach, asparagus, and of course, broccoli.

Roasted Broccoli

1 bunch of broccoli
2-3 garlic cloves
1 lemon
salt & pepper
olive oil

Preheat the oven to 425.

Cut the broccoli off the big stem into florets. Slice the garlic thinly. Put the broccoli and garlic in a large bowl. Season with salt and pepper. Drizzle with olive oil. Toss to cover evenly.

Spread the broccoli and garlic on a cookie sheet. (I lined mine with heavy-duty foil first.) Roast in the oven for about 20 minutes.

After you pull the broccoli out of the oven, zest about half the lemon over the broccoli. Slice the lemon in half, and squeeze the juice over the broccoli, too.

Top with finely grated parmesan.

Wednesday, March 17, 2010

infusion conclusion

Well, Infusion 5000 has come and gone. About 20 people came over, and we tasted 13 infused liquors. It was a blind tasting – we had scorecards and everything, even a trophy!

I spent most of the evening pouring samples for everyone.

There were interesting combinations, some good and some not so much. After such success with our initial infusions, I went for a more complex flavor. Unfortunately, sun-dried tomatoes, bell peppers, onions, garlic, olives, basil, and oregano in vodka turned out to be disgusting. Might work in a Bloody Mary, though.
The scorecards had space for people to guess what had been put in each liquor. There were lots of references to medicine and disinfectants. Bengay, soap, and moisturizer. Walgreen’s cologne. “It burns!” Staircase pigs. (Turned out Mokry was trying to write staircase piss.) My favorite, however, was in reference to one of the last vodkas. One judge wrote, “Same. They all taste the same now.”

Of course, there were a lot of insightful guesses, too. And some tasty liquors. Tott took third with her apple, ginger, and vanilla vodka. Kaytie won second. She soaked basically any dried fruit she could find – figs, dates, apricots, blueberries, cherries – and tossed in some fennel, vanilla, nutmeg, and I’m honestly not sure what else. It was good, though. The grand champion was Mary Kendall. She infused bourbon with honey and rosemary. Yum.

Anyway, here are some tips for infusing your own liquors.

Fatty substances, such as meat, dairy, or nuts do not infuse well.

Herbs infuse quickly; dried spices, even more so.

Buy dried herbs and spices in bulk; they’re so much cheaper that way.

Dried fruits work better than fresh fruits.

A combination of dried and fresh fruits or herbs is a good idea.

Higher-proof alcohol works best.

Fresh ingredients may rot if left in alcohol for too long.

Fruits and vegetables may take a while to infuse; best to start early and strain out if worried about rot.

Classic flavor combinations you enjoy in food will work well—e.g., lemon and basil, cinnamon and vanilla, orange and cloves.
Fruit will take about 2-3 weeks to infuse, and herbs will take about one week.

Wednesday, March 10, 2010

stating the obvious


I realize that most of our six readers are serious foodies and accomplished cooks. This post, however, is for the rest of you. I am going to tell you something very obvious--how to make a very tasty salad.

A salad is something I rarely crave (unlike Tott, who can put away AN ENTIRE BAG OF RAW SPINACH in one sitting). My grandfather calls it "rabbit food," and I pretty much feel the same way. But lately I've been trying to eat in a healthier way (five pounds down, baby!), so I've been wracking my brain to come up with interesting salads.

This was one that I actually enjoyed more than my main course (a fine but unexciting chicken couscous), so I figured I'd share.

A Good, If Obvious, Salad

baby spinach
red grapes
white onion
roquefort cheese
spiced walnuts
Newman's Own Light Balsamic Vinaigrette

Make the walnuts (see linked recipe). Dice white onion fine. Salt. Saute in a little olive oil over medium-high heat until browned. Remove from heat and cool. Put on top of salad with other ingredients and toss with dressing. (I went easy on the cheese and nuts 'cause the fat. If you are not watching your girlish figure, don't worry about it--put as much as you like.)

PS--I just realized that I posted this under DREW's name, not mine! Ha! That makes this post much funnier if you read it thinking Drew is writing.

Sunday, March 7, 2010

infusion profusion

Last fall, kumquat trees were on sale for seven dollars. Seven bucks?! Of course I bought one. It had a bunch of green kumquats on it, and they ripened to orange. Which presented the question: What could we do with a bunch of kumquats?

Well, duh. We decided to soak them in vodka. There’s a little background here. I’d bought some glassware from a chemical supply company, and I’d been intending to make some infused liquors. Maybe a mint rum, or a lemon basil vodka, or a pepper vodka. These bottles had sat in a box for months. Finally, I had an excuse to buy a lot of vodka. (Luckily, we harvested the kumquats before the snow came.)

We had four bottles, so we went to the store and wandered around the produce section. We decided on four combinations: kumquats & rosemary; pomegranates & basil; blood oranges & star anise; and lemons, cucumbers, & dill.


Well, we opened the pomegranate & basil vodka with a few friends, and it was quickly gone. (Before I could even take a picture of it!) Delicious. The kumquat & rosemary was similarly dispatched. (Note: if you want to cover the taste of alcohol, use rosemary. Worked like a charm.) We have yet to drink the blood orange & anise vodka, but we’ve tasted it, and it is great. The herbs make these vodkas light and refreshing – something that makes a great aperitif over ice with club soda.

Notice that I have not mentioned the lemon, cucumber, & dill infusion. That’s because it was disgusting. It tasted like rotten pickles. We quickly dumped it down the sink.

Three successes out of four attempts is a pretty good record, especially since we had no real idea what we were doing. After a conversation with a mixologist at Cure in New Orleans, Kaytie came home with a wealth of information about infusing liquors, and we wanted to try more.

We also needed an excuse to have a party. The logical conclusion? Infusion 5000: The Epic Infused Liquor Contest! It’s going down this weekend. Stay tuned for the results.

Thursday, March 4, 2010

mom's favorite breakfast

Whenever we visit Dallas, Mom has banana bread as an option for breakfast. Consequently, I have made the assumption that she LOVES banana bread.

(Of course, it is possible that she has banana bread because she thinks WE love it. There was a period of several years when she would have a huge bowl of red apples waiting for me every single time I came to visit. I wasn't particularly fond of red apples, but Mom thought I liked them, so she made sure to always have them on hand. She's that kind of mom. I’m currently trying to impress upon her my love for cookies in hopes that there will always be a big plate of them in Dallas!)

Regardless, I think Mom likes banana bread. So, when she came to town last weekend, I had to have some banana bread ready for Saturday breakfast. BUT, for some reason, I don’t have her recipe. After looking at a couple online and trying one from a coworker, I’ve come up with a great recipe. (It got Mom’s stamp of approval.)

Banana Bread

5 ½ Tbs butter, at room temp
1 cup sugar
6 ripe bananas, mashed
1 tsp vanilla
1/3 cup pineapple juice
1 egg
½ tsp salt
1 tsp baking soda
½ tsp baking powder
1 2/3 cups flour

First, let’s talk bananas. When a banana gets too dark, throw it in the freezer (peel on). When you have 6 bananas, you’re ready for this recipe. Why freeze them? I have found that when you thaw a frozen banana, it will be so gooshy that it is almost impossible to hold. It is disgusting, but so soft. And perfect for banana bread.

Okay, preheat the oven to 350.

Cream the butter and sugar together until smooth. Mix in the bananas, vanilla, and pineapple juice. Beat in the egg.

Add the salt, baking soda, and baking powder, and mix it in.

Mix in the flour.

Grease a 4 x 8 loaf pan. If you want to be sure that your bread will come out of the pan without sticking to the bottom, here’s a trick - cut a piece of parchment paper to fit the bottom of the pan. After you grease the pan, press the paper onto the bottom, and grease the pan again. When the bread comes out of the pan, you’ll be able to peel the paper off the bottom of your bread.

Pour the batter into the pan, and bake it for about 1 hour and 15 minutes.

The bread will be done when a toothpick inserted in the center of the loaf comes out clean. Take the bread out of the pan, and cool it on a rack.

Sunday, February 28, 2010

guest blogger: my mom!


Cena di Sicilia

Antipasti

Golden Risotto
with Shrimp

Seared Tuna
with Sweet-Sour Onions
Salad Greens in
Olive Oil Vinaigrette
Semolina Bread

Regaleali Bianco,
Tasca d’Almerita

Blood Orange and
Kiwi Composition
Almond Thins

I am Drew’s mother, and therefore, Kaytie’s mother-in-law. First of all, that’s fun because I love their medley of wonderful traits and talents, and second, because they love to cook and I love to eat. I like to think that I taught Drew everything I know about cooking, and maybe I did plant some seeds and a few family recipes, but the truth is, he and Kaytie take cooking to new levels as they add their own touches to existing recipes and invent new ones to share on this blog.

So when I told them about a recent “theme” dinner at our house, Kaytie invited me to be a guest blogger on Tiny Biscuits!
For Christmas our friends Cynthia and Bob gave us a copy of a newly-released cookbook written by their sister-in-law. Seafood alla Siciliana, by Toni Lydecker, is a beautiful book, so when I planned an evening with our dinner group (4 couples, including Bob and Cynthia) I thought it would be fun for each of us to cook a dish from Toni’s book. (We may be baby boomers, but our husbands do cook).
I planned the menu and my friends enthusiastically chose the part they each wanted to make. Chris and David started us off with the Antipasti. Their homemade crostini was especially perfect for the eggplant spread, and the herbs and olive oil they added to the mozzarella balls were delicious!
Gail made the Risotto with Shrimp, page 122, once she arrived so it could be served immediately when prepared, and we all licked our plates, partly because the orange zest made this dish so good.
My husband and I chose to do the Seared Tuna, page 183; the sweet-sour onions were a perfect complement to the tuna, along with the mint garnish. This dish was delicious, though next time we’ll be more generous with the sea salt and pepper when we season the fish. I also made the Semolina Bread which was fantastic - so well-worth the time. We found the semolina flour at Jimmy’s, a great Italian grocery store, as well as several of the wines that Toni suggests in her book.

We ended with Cynthia’s dessert – Kiwis and Blood Oranges, page 248 – fresh, light, and authentic since January is blood orange season in Italy, even though to buy them in Dallas in January you have to live with the guilt of carbon footprint. She planned on making the Almond Thins, page 245, but arrived with the Sesame Seed Cookies, page 246, as well, thank goodness! It’s OK to eat all the cookies if you eat your fruit – right?

We ended our gourmet dinner with dessert wine and espresso, ready to get together again with some more of Toni’s great recipes!


Seared Tuna with Sweet-Sour Onions

1 large tuna steak (about 1 lb), cut into 3-4 portions
kosher salt
fresh ground black pepper (optional)
5 Tbs red wine vinegar
1 Tbs sugar (or to taste)
1 large red onion, cut in wedges
extra-virgin olive oil
several mint leaves, snipped into ribbons

Season the tuna on both side with salt and pepper.

In a small bowl, mix vinegar, sugar, and a pinch of salt with ¼ cup water. This is the sweet-sour mixture.

In a heavy-bottomed skillet, combine the onion with a little olive oil. Cook over medium-low heat, covered, until soft, about 10 minutes. Add the sweet-sour mixture, stirring often as the liquid evaporates and the onions caramelize. Transfer to a bowl.

Wipe the skillet clean. Add 1 Tbs olive oil, and raise the heat to medium. Sear the tuna until well browned. Turn the steaks over, and pile the onions on top. As soon as the second side is browned, reduce the heat and add a little water. Simmer a minute or so for medium rare.

Transfer the tuna to dinner plates. Deglaze the pan by adding a little water, and cook until thickened. Drizzle over the onion-topped steaks. Sprinkle with mint.

Serve warm or at room temperature.

Sunday, February 14, 2010

hot chocolate

Success! After a failed attempt at Emeril's white chocolate pots de creme, I went in search of a new, better recipe written by someone who can complete a sentence coherently and whose catch phrase is an actual phrase, not a single syllable. (So I'm not an Emeril fan. His recipe didn't work.)

Anyway, I googled pots de creme and found a recipe that I liked. Then, I fiddled with it. What resulted was a delicious, rich, make-sink-to-the-bottom-of-the-pool-if-you-don't-wait-at-least-an-hour-or-two dessert.

Hot and sweet is a great combination. (That's why I married Kaytie!) Here, you get the sweet bitterness of dark chocolate, followed by the heat from the cayenne. Plus, you get to feel like Montezuma. If, however, you are a spice weenie, you can leave out the cayenne.

Aztec Pots de Creme
(makes 8)

1 1/3 cups heavy cream
2/3 cup whole milk
6 oz bittersweet chocolate
1/4 tsp cayenne pepper
6 large egg yolks
2 Tbs sugar
1/2 tsp vanilla

Preheat the oven to 300.

Dump the chocolate in a heatproof bowl. I used chocolate chips, but if you have a large chunk, chop it into small chunks.

In another bowl, whisk together the yolks, sugar, cayenne, and a pinch of salt.

Combine the cream, milk, vanilla, and a pinch of salt in a saucepan. Scald the mixture. (Heat over medium high heat until little bubbles form around the edge. Don't bring it all the way to a boil, though.)

Pour the hot mixture over the chocolate, and whisk until well-combined.

Start whisking the yolks, and continue to whisk as you slowly stream in the chocolate. (This is where a buddy might come in handy.)

Pour the mixture through a strainer to remove any chunks of egg that might have formed. (They shouldn't, if you whisk like mad and pour slowly.) Let this sit for 15 minutes.

Get a big baking pan that can hold eight 6-oz creme brulee ramekins and that has sides at least an inch or two high. A turkey-roasting pan worked for me. Line the bottom of the pan with a dish towel.

Divide the chocolate mixture evenly among the eight ramekins. Set them in the pan, on the dish towel. Move the big pan to the middle rack of your oven. Using hot tap water, fill the roasting pan with water so that it comes halfway up the sides of the ramekins. Cover the roasting pan with foil, and poke a couple holes in the foil.

Bake 30-35 minutes, until the edges are set and the centers wobble just a little when you jiggle each ramekin.

Remove the ramekins from the water bath, and cool them on a rack for an hour. Finish cooling them in the fridge for at least three more hours.

Serve with florentine cookies, and garnish with Kahlua whipped cream.


Kahlua Whipped Cream

2 Tbs Splenda (or powdered sugar would probably work)
2/3 cup heavy whipping cream
2 Tbs Kahlua

Put your bowl and beater in the freezer for 10-15 minutes.

Put the cream and Splenda in the bowl, and whip like mad. You can use a whisk, but an electric mixer is so much easier.

When you've gotten the consistency you desire, gently fold in the Kahlua.

shrimp veracruzana

Hola!

There is really nothing more satisfying than creating a new dish and serving it to Tott. She is so appreciative! Drew is, too, but he is bound by marriage to like what I do. Tott is not, so when she smacks her lips in approval, I am gratified.

We were digging through my Paula Peck cookbook this weekend when we came across "Red Fish Veracruzana." It sounded wonderful, but it's kind of a pain to get fresh fish around here. It can be done, but it's not cheap or easy. (So many "cheap and easy" jokes could be made right here at either my or Tott's expense; I'll refrain.) Anyway, I decided to make it using shrimp instead. With a few improvisations, it resulted in a dish that I'd serve to real company, not just Tott.

The recipe is quick and relatively light, too. Served with a green salad with some ripe avacado, it was a perfectly wonderful meal.

Shrimp Veracruzana

1 pound of shrimp, heads off, peel on
2 jalapenos, seeded and chopped
1 green bell pepper, seeded and chopped
2 onions, minced
½ onion, not chopped
1 stalk celery, rough chopped
1 lemon
4 cloves of garlic, minced
2 bay leaves
1 tablespoon basil, chopped
1 tablespoon oregano, chopped
1 teaspoon cumin
1 teaspoon chili powder
1 tablespoon cayenne
1 can crushed tomatoes (or 2 cups of fresh tomatoes, seeded, peeled, and diced)
2 tablespoons tomato puree
½ teaspoon sugar
½ cup white wine (preferably sauvignon blanc)
½ cup green olives, sliced
½ cup black olives, sliced
½ cup cilantro, minced
olive oil
butter

First, peel the shrimp. Do not throw the shrimp peels away. Put them in a small pot with the ½ onion, lemon cut in half, cayenne, and fill with water to cover. Simmer over low heat while chopping other veggies. This is your shrimp stock.


Take a medium saucepan and heat on medium. Add olive oil to coat bottom. Once oil is hot, add peppers, onions, and garlic. Once veggies are soft, add basil, oregano, chili powder, cumin, and bay. Toss and let cook about 2 minutes longer. In those 2 minutes, strain the shrimp stock. Add ½ a cup to the pan of veggies. Add tomatoes, tomato puree, wine, and sugar. You may add hot sauce liberally at this step if you like things caliente.


Cook down until sauce thickens up a bit and comes together–maybe 5-10 minutes on medium heat. Once you’ve tasted the sauce and you like it, add the shrimp. Cook until the moment they all look white/pink on the outside–NO LONGER. Then, immediately take off of the heat and stir in the olives and cilantro. If you are decadent, and I am, swirl in about 2 tablespoons of soft butter at this point, stirring until completely dissolved. Serve atop rice or pasta.

Wednesday, February 10, 2010

deceptively simple

Top Ten Reasons This is the Perfect Valentine’s Dessert

10. Everybody loves crème brulee. Everybody.
9. This recipe makes enough for six. Unless you’re a swinger, you’ll have leftovers.
8. You can buy yourself a Valentine’s present – special kitchen gear!
7. Crème brulee looks great by candlelight.
6. Preparing it ahead of time gives you time to shave.
5. Tastes great. ‘Nuf said.
4. Less filling – won’t make you feel too heavy for that midnight dip in the hot tub.
3. Blowtorches are sexy.
2. A fancy dessert like this can make up for any crappy dinner. Finish on a high note.
1. It’s so much easier to do than it looks.

Fuzzy Navel Crème Brulee

2 cups heavy cream
1 Tbs vanilla
1 Tbs orange zest (I used blood oranges, but any orange’ll do)
1 small egg
3 large egg yolks
7 Tbs peach syrup (maple syrup is an okay substitute)
4 Tbs Sugar-in-the-Raw, for topping
6 (4-ounce) brulee molds
1 kitchen torch (not completely necessary, but awesome)

Preheat the oven to 325 degrees F.

Pour the heavy cream and vanilla into a pan and place over medium heat. Scald the cream by heating it until bubbles start to form around the edge of the pan. Remove from the heat.

While cream is heating, whisk together the whole egg, egg yolks, syrup, and orange zest until well blended.

Continue to whisk while slowly pouring the hot cream into the egg mixture and whisk until the mixture is smooth and evenly mixed. Pour the mixture through a fine-mesh strainer or through cheesecloth to remove any overcooked eggs and orange zest. (Your next step will be easier if you strain the mixture into a large liquid measuring cup or a bowl with a spout.)

Place the brulee molds on a baking sheet with 1-inch-high sides or in a casserole dish. Fill the molds half-full with the custard and set the sheet in the oven. (It’s much easier to move the sheet with the molds only half-full.) Now, finish filling the molds.

Using hot tap water, pour enough water into the baking sheet (or casserole dish) to reach halfway up the sides of the molds. The water bath will make sure the custard cooks evenly.

Bake about 40 minutes. When finished, the custard should tremble slightly when gently shaken. If it looks like there is any liquid under the skin of the custards, put them back in the oven and shake them every 5 minutes or so until they are ready.

Remove the molds from the water bath and place on a cooling rack for 30 minutes. Then refrigerate for 2 hours (or for up to 3 days) before serving.

Caramelize the sugar topping right before serving. If there is any condensation on the top of the custard, blot it up carefully with a paper towel. Sprinkle about 2 teaspoons of the sugar over the top of the custards. Make sure you spread the sugar evenly; if it is too thick or too thin in places, the caramelization will not be even.

Fire up the kitchen torch. Keep it moving as you caramelize the sugar to a deep, liquidy brown. It will harden as soon as you stop torching it.

(If you’ve spent too much on flowers and silk sheets to buy your own kitchen torch, you can caramelize the sugar in the oven. Put the custards on a baking sheet, sprinkle the sugar, and set the oven on broil. When the broiler is hot, place the sheet about 4 inches under the broiler, and heat until the sugar is caramelized. You’re more likely to burn the crème brulee under the broiler, so you must watch the caramelizing closely! They are finished when they are light brown.)

Sunday, February 7, 2010

high steaks


This fire was on purpose. (Not like the oven fire of '08.)

We decided to make a fancy dinner one Saturday night in the recent past. Kaytie made glazed carrots and twice-baked potatoes, and I was in charge of the meat.

Well, in charge of cooking the meat. Kaytie wanted Steak Diane. I, of course, agreed with her. (She’s rarely wrong, especially about food; she always out-orders me at restaurants.) After a bit of research, I combined several recipes and came up with this delicious dish.

By the way, what was for dessert? Fuzzy Navel Creme Brulee! (Coming soon to this very blog!)

Steak Diane

1 lb beef tenderloin, sliced into 8 thin filets
2 Tbs butter, divided
1 cup sliced mushrooms
3 Tbs shallot, diced
1 tsp mustard
juice of 1 lemon
1 Tbs Worcestershire sauce
¼ cup heavy cream
about 2 Tbs chopped fresh parsley
about 1 oz brandy
red wine (mostly for drinking, but reserve a splash or two)
½ tsp salt, plus salt & pepper to taste

Heat a cast-iron skillet over medium-high heat. Melt 1 Tbs butter. Salt & pepper one side of each filet, and place that side down on the hot skillet. Season the upper sides of the filets with salt & pepper as they cook in the skillet for exactly 2 minutes. Flip the filets, cook for 2 minutes on that side, and remove them from the pan.

Turn down the heat to medium, and melt another tablespoon of butter in the skillet. Add mushrooms, shallots, lemon juice, Worcestershire sauce, and ½ tsp salt, and cook, stirring, until the mushrooms are tender.

Add the cream and cook for 2-3 minutes. The sauce will begin to reduce a bit. Use your splashes of red wine if the sauce looks like it is getting too thick or separating.

Stir in the parsley, saving just a little for garnishing on the plate.

Put the meat back in the pan, and squoosh it around briefly in the sauce.

Here’s the fun part! Add the brandy, stir very briefly (once or twice around the pan), and tilt the pan so the sauce gathers at one edge. Light the fumes coming off of the sauce, and let the fire burn itself out. (This is traditionally done at the table. You should definitely have an audience to appreciate how awesome you are.)

Serve immediately, pouring the sauce over the steak and garnishing with parsley.

**NOTE: This method should cook the steaks to medium rare. If you want them more done (though I don’t think you should), just cook them longer on each side.